Posted on:
How to build a blog website with a newsletter system using Next.js, Payload CMS, and Novu?
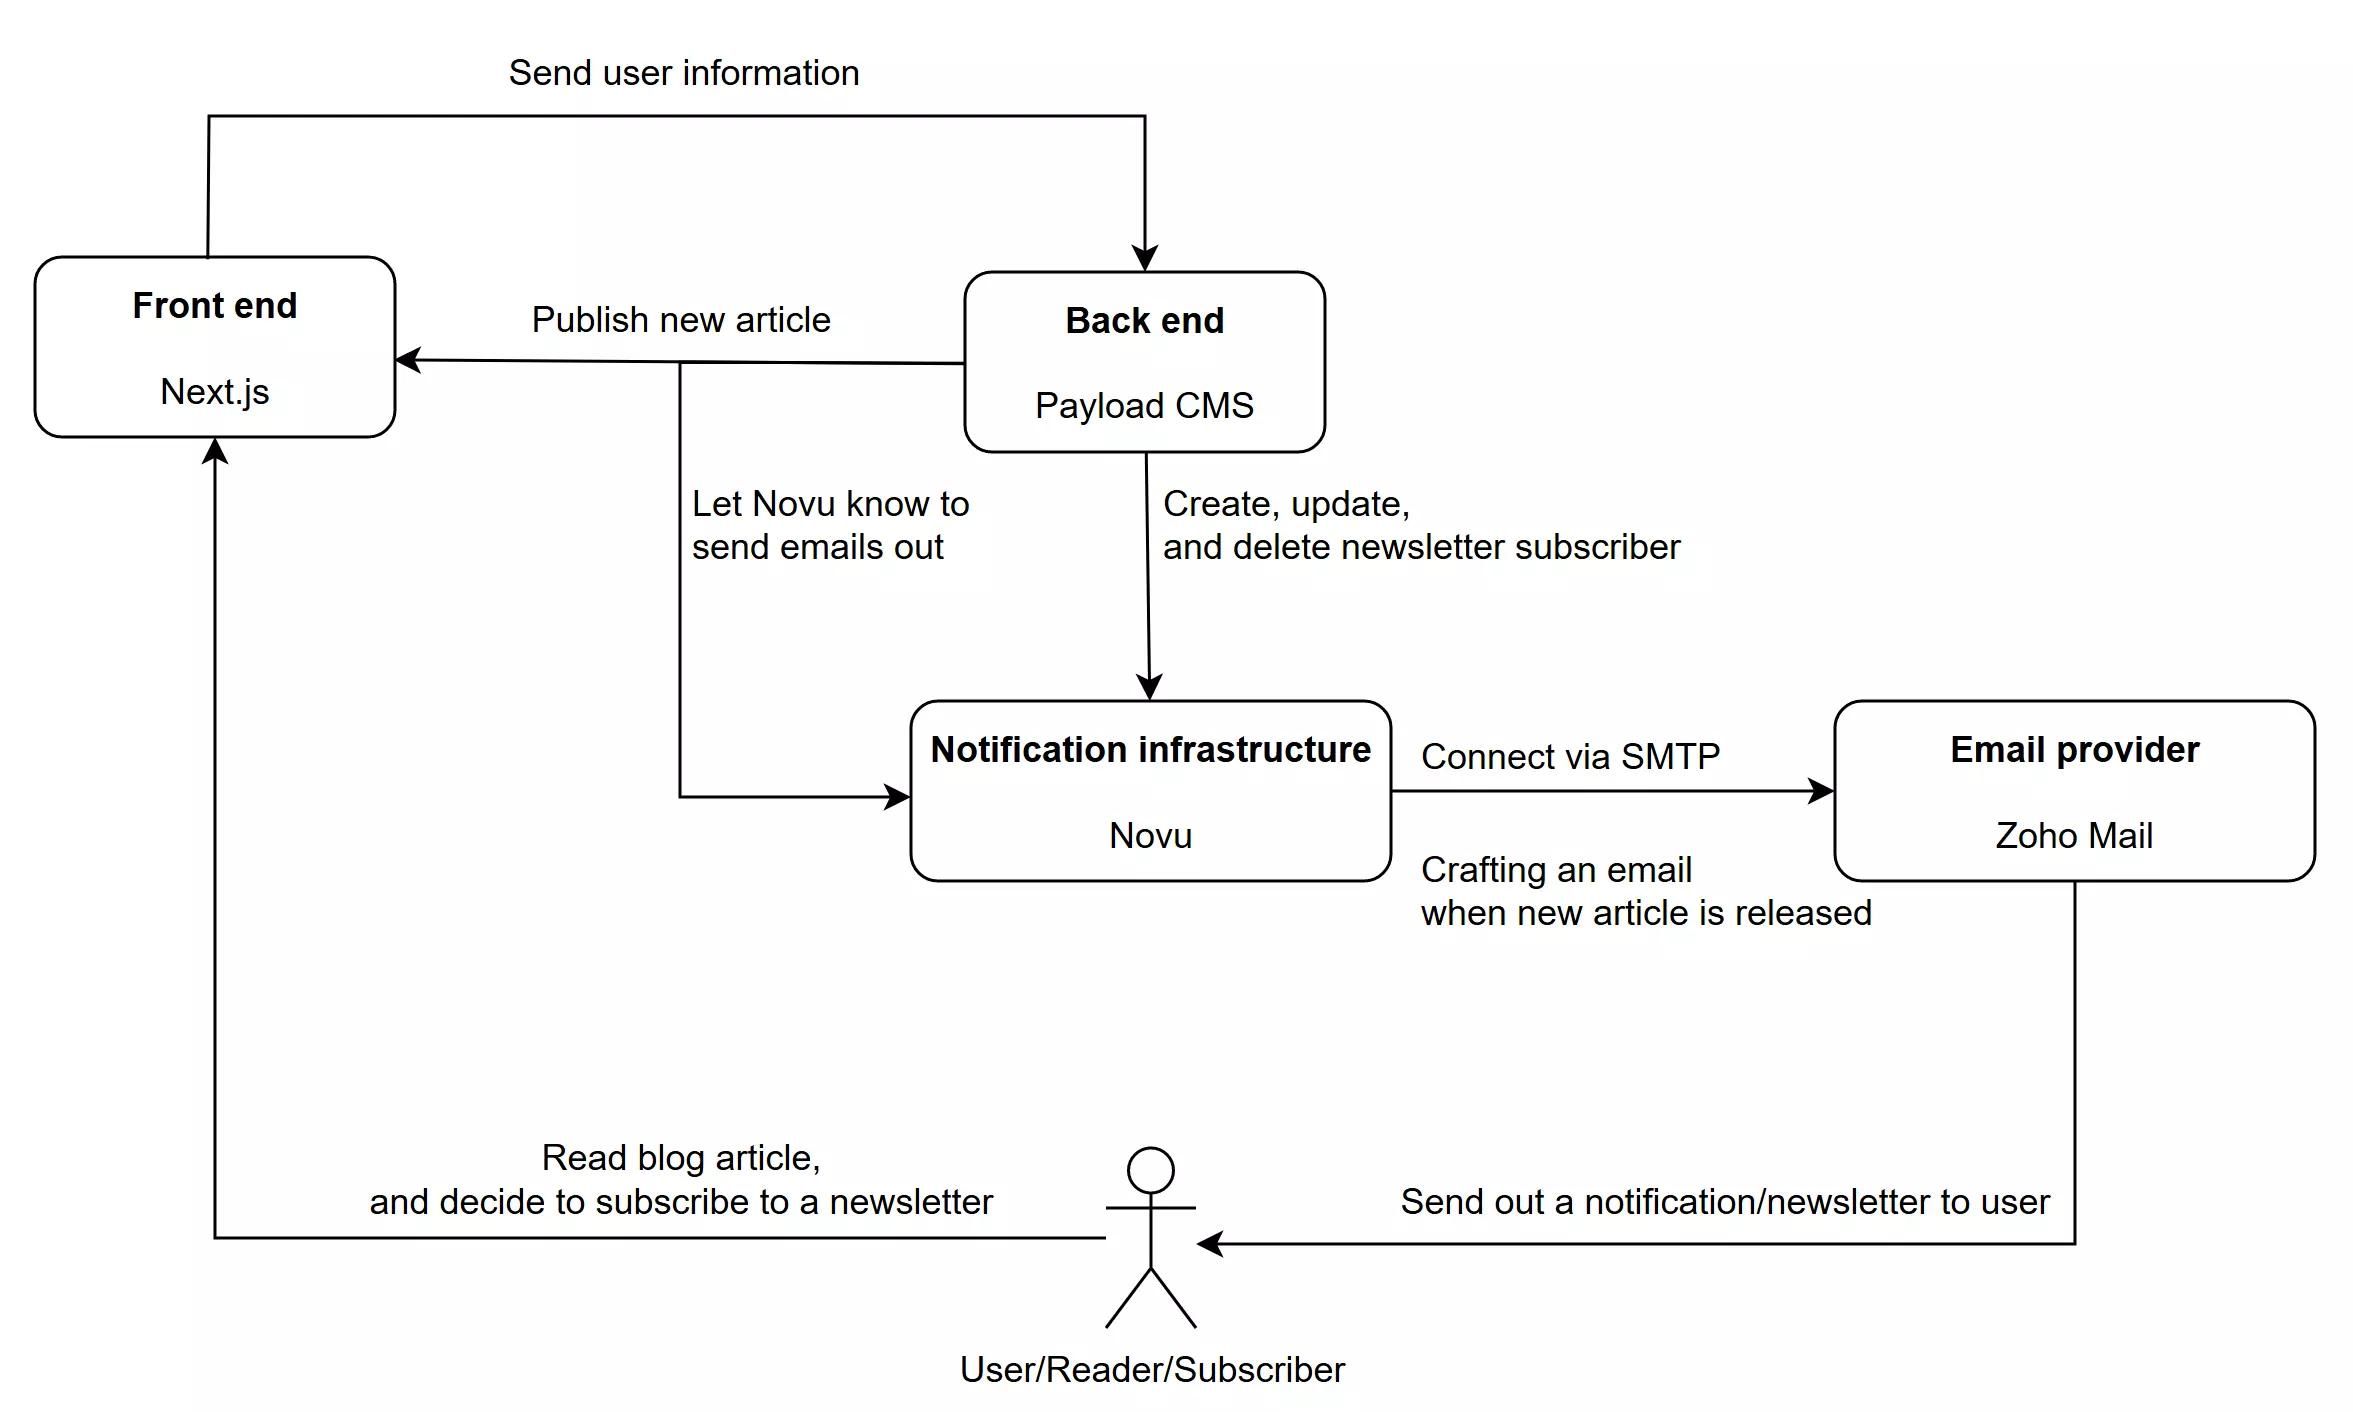
In this tutorial, you will learn how to create a blog on your own that notifies newsletter subscribers when a new article arrives.
TL;DR
In this tutorial, you will learn how to create a blog on your own that notifies newsletter subscribers when a new article arrives. Throughout the tutorial, there are several visual demonstrations and sample codes to help you navigate through the project. The sample blog uses Novu as a notification system, Zoho Mail as an email provider, Payload CMS for the back end, and Next.js for the front end.
Novu - the first open-source notification infrastructure
Just a quick background about us. Novu provides a unified API that makes it simple to send notifications through multiple channels, including In-App, Push, Email, SMS, and Chat. With Novu, you can create custom workflows and define conditions for each channel, ensuring that your notifications are delivered in the most effective way possible.
This article was my contribution to the Novu blog. I would be super happy if you could give them a star ❤️ https://github.com/novuhq/novu
Introduction
In recent years, learning in public has become a way to improve yourself and demonstrate your skill sets to potential employers. One of the popular ways to do so is by creating a blog, where you can publicly present your achievement and discuss technical topics with the audience. That all sounds good on paper, but how to start actually?
Novu provides a simple way to manage multiple complex notification workflows.
Creating a blog from the ground requires a full-stack experience. Let’s think about some questions such as those below.
- Do you know how to set up an email server?
- Do you know how to send emails across different channels via code?
- Do you know how to secure a database?
So on and so forth. To create a full-fledged application, many concerns need to be addressed. With that said, this tutorial can help you bootstrap a simple blog that for the most part, works out of the box, in which, many functions are handled by well-known and battle-tested tools such as Novu for all the email-related functionalities.
What are the key technologies to create this blog?
Novu, an open-source notification infrastructure for developers
- When publishing a new article, you want the readers to know that your content is now available. There are several channels to do so, such as SMSs, emails, in-app messages, and so on. Arguably, implementing a notification feature in your application might not be that complicated, but when talking about management and maintenance at scale, it is another can of worms. This is where a notification infrastructure comes into play.
- Novu abstracts away all the hard-core implementation and is production-ready out-of-the-box. With Novu, you can centrally manage notifications across multiple channels in a user-friendly dashboard. This includes but is not limited to integration with third-party providers like email, SMS, push, chat, and in-app as well as analytics of notifications and subscribers.
- As an open-source solution, you can completely self-host and customize Novu however you see fit. Also, if you want to delegate service management to other people, Novu offers a fully managed cloud-hosted solution that can get you running in a matter of minutes.
- In this article, you will learn about the use and implementation of email notifications using a free cloud-hosted version of Novu.
Zoho Mail, a workspace email platform
- Zoho Mail is a fully managed cloud-hosted email service provider. Technically, it is more of a workspace email service (communication between human users), rather than a transactional and marketing email service (automatic emails). However, it is possible to use Zoho Mail as an email-as-a-service platform too.
- To ensure consistency, all examples in this article use the author’s email. When following the article, you should change the examples to your accounts and domains.
- Zoho Mail’s free plan is more than sufficient to demonstrate Novu’s capabilities. The integration will be done via a Simple Mail Transfer Protocol (SMTP).
Payload CMS, the code first, open-source React and TypeScript headless content management service (CMS)
- Headless CMS is a broad topic and there are lots of things to talk about in it. Essentially, a headless CMS is a complete back-end of your website. With headless CMS such as Payload, you can bootstrap database schemas, security rules, templates, and many other features, so that you can dedicate more time to developing the front-end and actual contents.
- This article discusses the concept of headless CMS alongside a comparison between multiple products, it should be a good place for you to dive into this rabbit hole.
- Payload CMS only has a self-hosted solution at the moment, and you are going to use it in this article.
Next.js, the open-source React “meta” framework
- React is a popular UI library for creating a single-page application. With Next.js built on top of React, all toolings, configurations, and optimization are expanded and ready out-of-the-box.
- Next.js has a vast array of features, making it capable of becoming a full-stack framework. However, this article mainly focuses on using Next.js for the front end. Meanwhile, Payload CMS handles the back end of the blog.
How to set up Zoho Mail?
As a workspace email service, Zoho Mail can have different degrees of configuration depending on your personal/organizational policies. This article only shows the fundamental steps required to get Zoho Mail up and running, and the steps include:
- Sign up for a Zoho Mail account
- Add and verify domain ownership
- Configure email delivery, SPF, and DKIM
- Retrieve SMTP information and application-specific credentials
Sign up for a Zoho Mail Account
This is a rather trivial step. A Zoho Mail account can be created by filling in personal information or using third-party single sign-on (SSO). One thing to note, an account created here is a super administrator account for your whole domain. This admin account does not require it to be in the same domain as others. For example, you sign up with johndoe@example.com, and that can be an administrator for yourpersonaldomain.com.
Add and verify domain ownership
After the registration, you can access the Admin Console. This is where a super administrator controls the whole domain. Navigate to the Domains tab, this is where you can add your email domain.
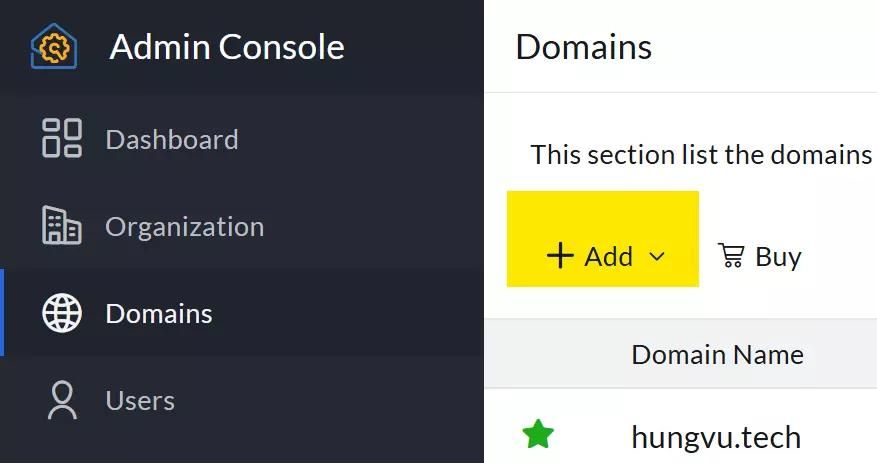
After that, there are several ways to verify domain ownership and one of the traditional ones is using a DNS record. Zoho Mail provides a unique and public TXT record that is used during the verification process. Add that to your DNS configuration, and your domain is verified.

Configure email delivery, SPF, and DKIM
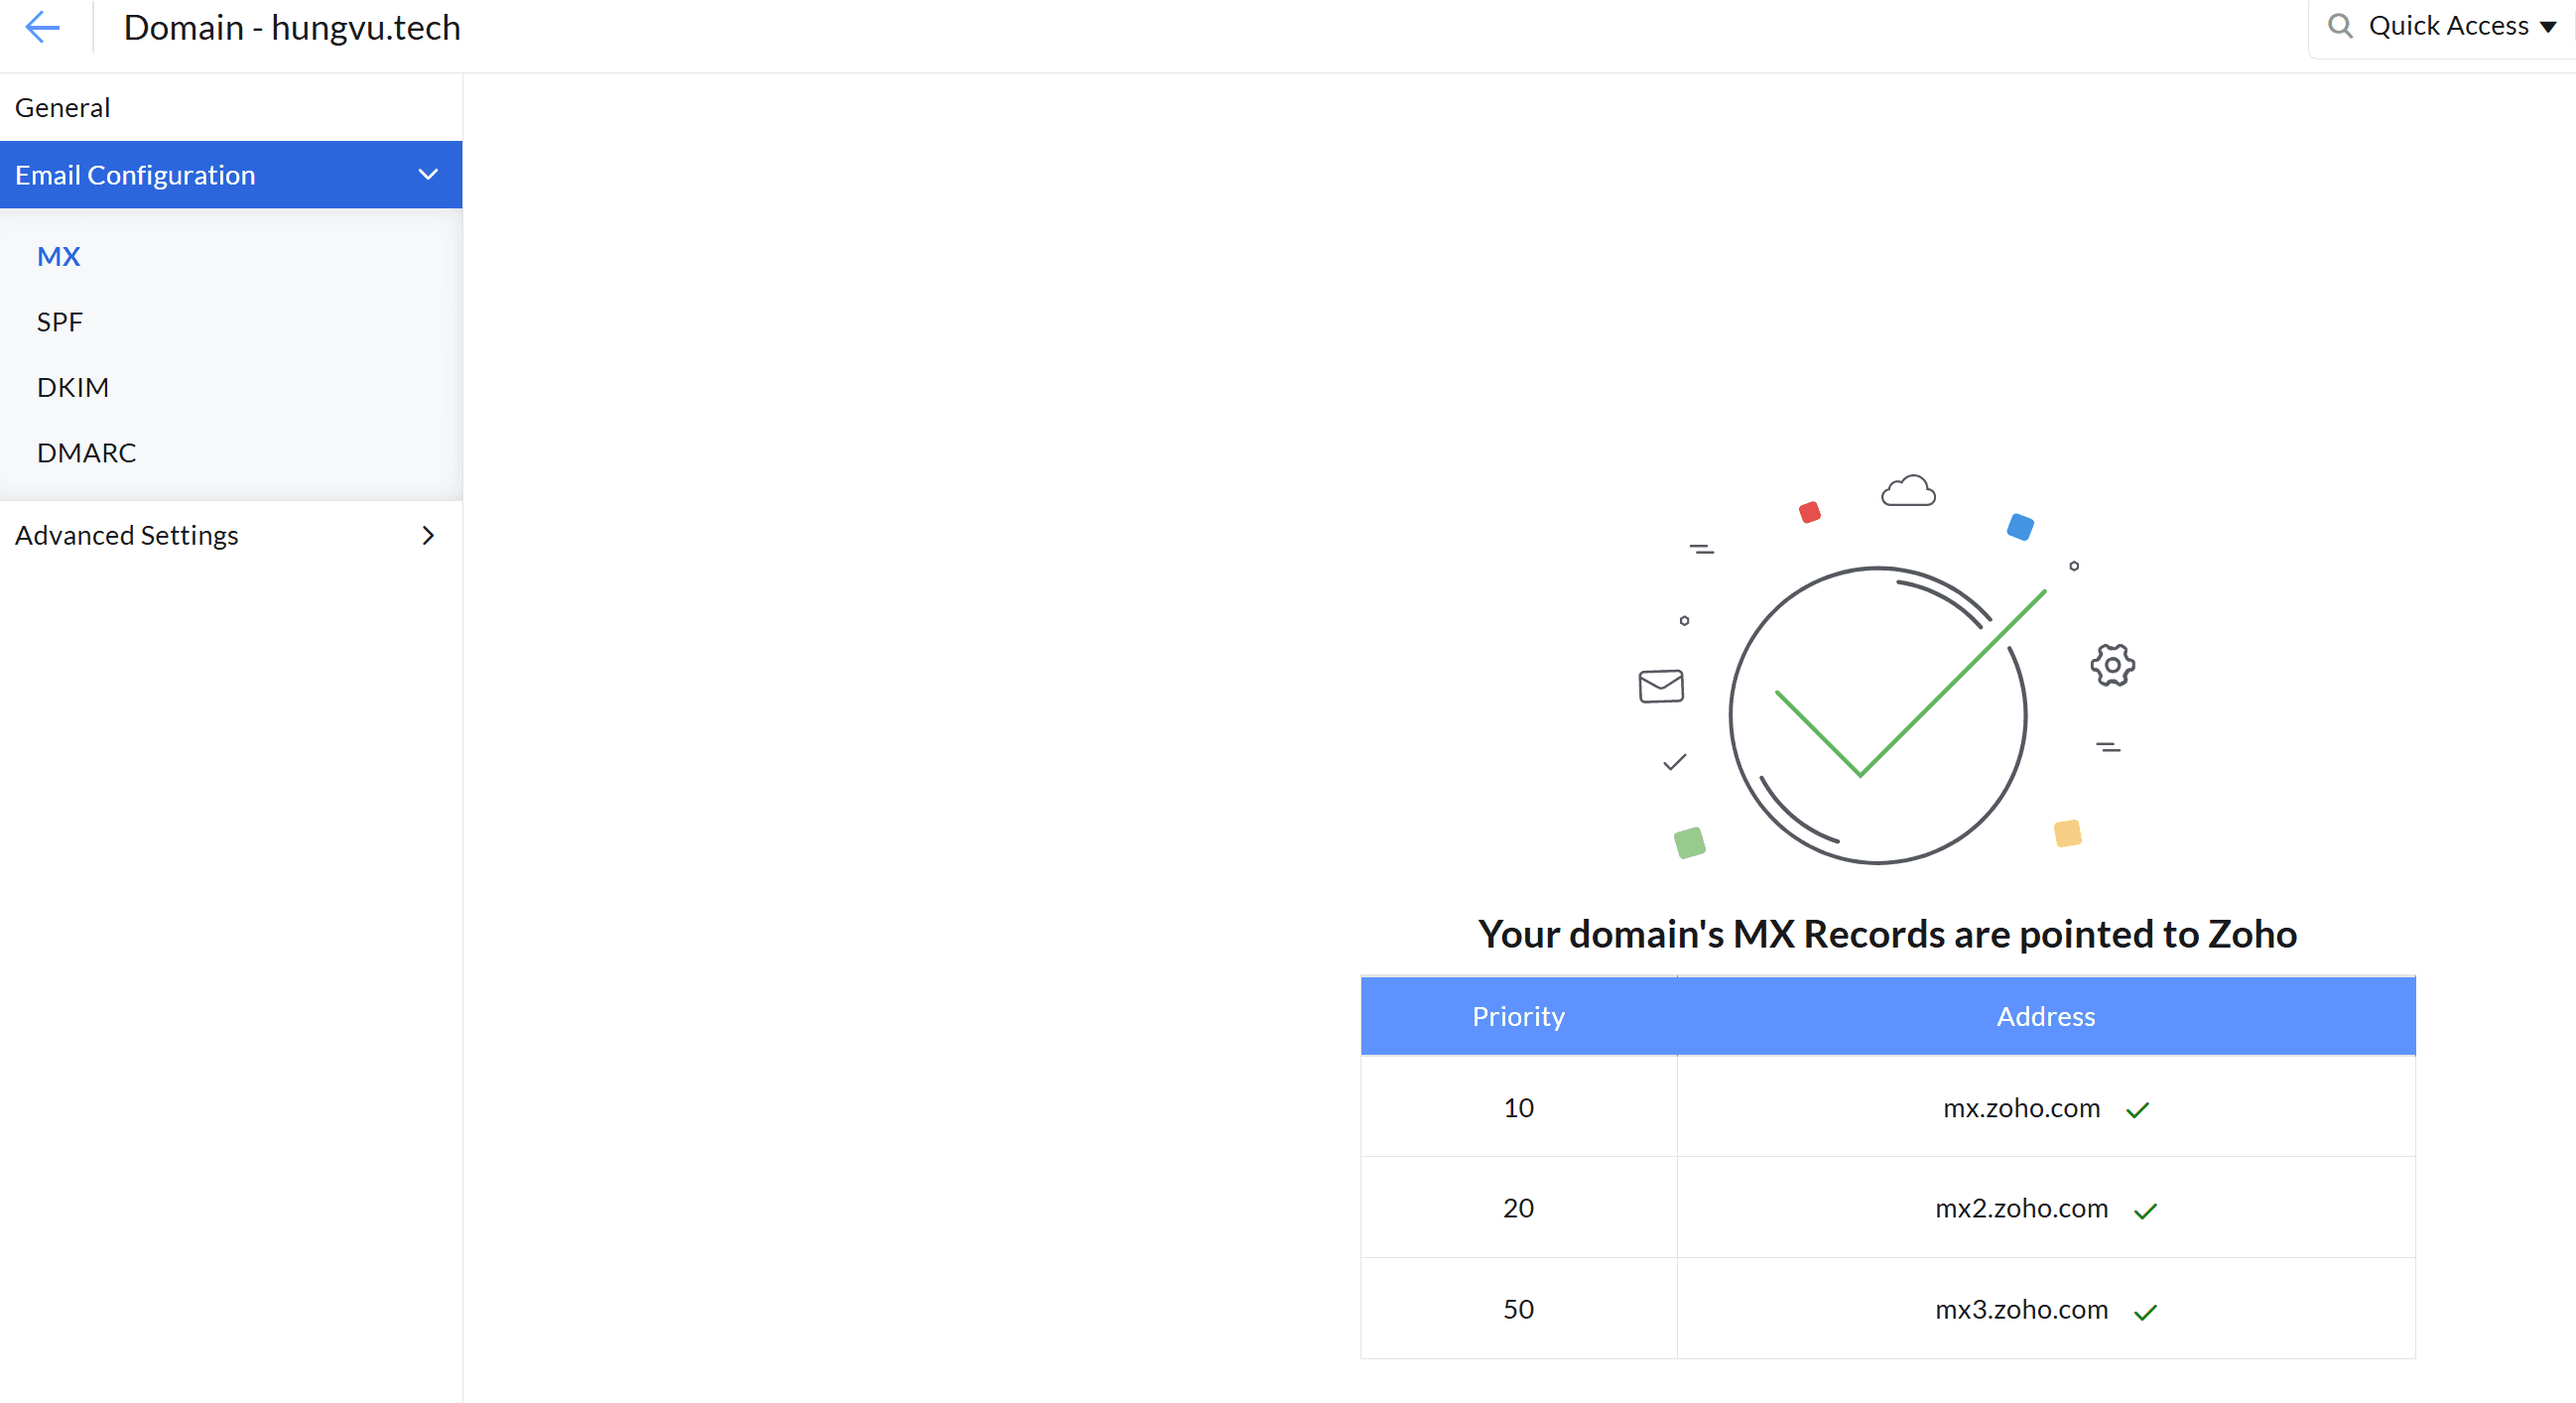
Technically, after the domain verification process. Zoho Mail is capable of sending emails out, but for incoming emails, more steps are needed. Also, with no Sender Policy Framework (SPF) and Domain Keys Identified Mail (DKIM), your domain is susceptible to certain types of domain spoofing attacks. Certain email recipients do outright reject emails from domains without a proper SPF and DKIM configuration, hence affecting your deliverability. With that said, click on the domain you just added mine is hungvu.tech, and go to Email Configuration. In there, Zoho Mail provides several more records to add to your DNS configuration, and you are good to go after the addition is complete.
Retrieve SMTP information and application-specific credentials
To connect Novu with Zoho Mail, you need to have SMTP configuration and account credentials. SMTP configuration resides in Mail Settings > Tools & Configurations > Configurations. It is recommended to use TLS configuration for SMTP.

For account credentials, you need App Passwords for the account. In a sense, this acts like an API key so Novu can bypass Zoho Mail’s multi-factor authentication, and it is not recommended to create an App Password on the super administrator account due to security implications. For some reason, you cannot generate App Passwords via an Admin Console, so it is necessary to sign in with a regular user account.
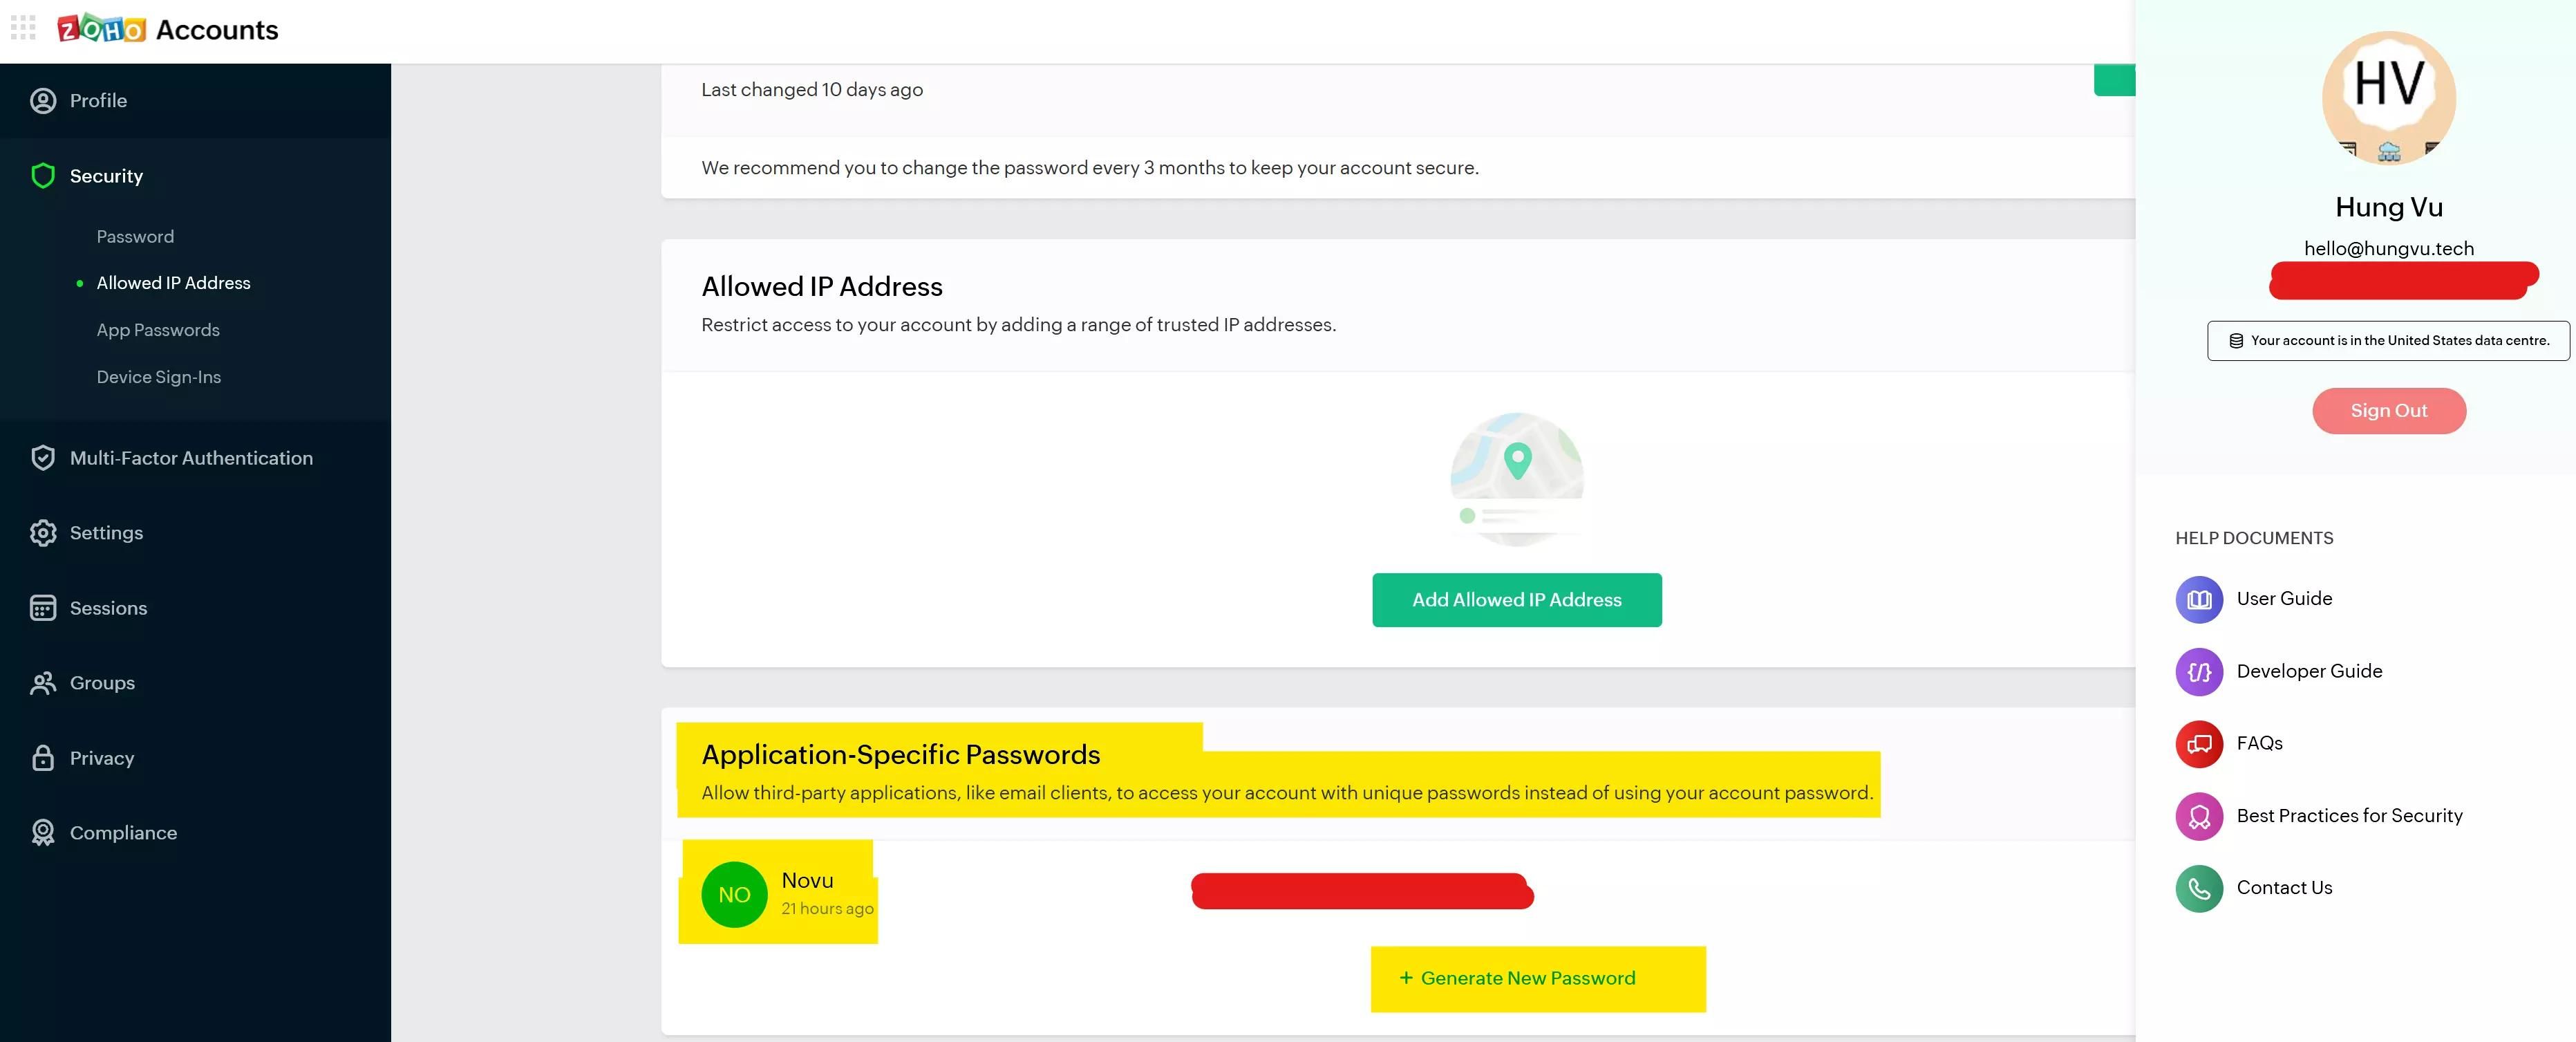
Within your regular user Zoho Mail dashboard, navigate to My Account > Security and scroll down to App Passwords (Application-Specific Passwords). There, you can generate or revoke the application password (Novu in this case) but keep in mind that the password is only displayed once. If you lose the password, then it needs to be generated again. Although the password is named Novu, it is more of a label, so other applications can also use the password. Certainly, it is not a good practice to share a password like that.
Now, your Zoho Mail account should be all set. It is time to see how we can send a Zoho email via Novu unified APIs.
How to set up Novu?
As a reminder, Novu offers both self-hosted and cloud solutions. To simplify the process, the cloud version is a great choice here. Therefore, the first step is to register an account at Novu. When first signing in, Novu shows very pleasing and user-friendly instructions to get you started. Let’s see what they are.

Connect your delivery provider
Novu supports several providers across different channels including email, SMS, Chat, and Push notification. There is no integration for Zoho out of the box. However, Novu supports a custom SMTP integration, meaning you can connect with practically every email service as SMTP is a widely adopted protocol. Certainly, Zoho also supports SMTP (as shown in the previous section).
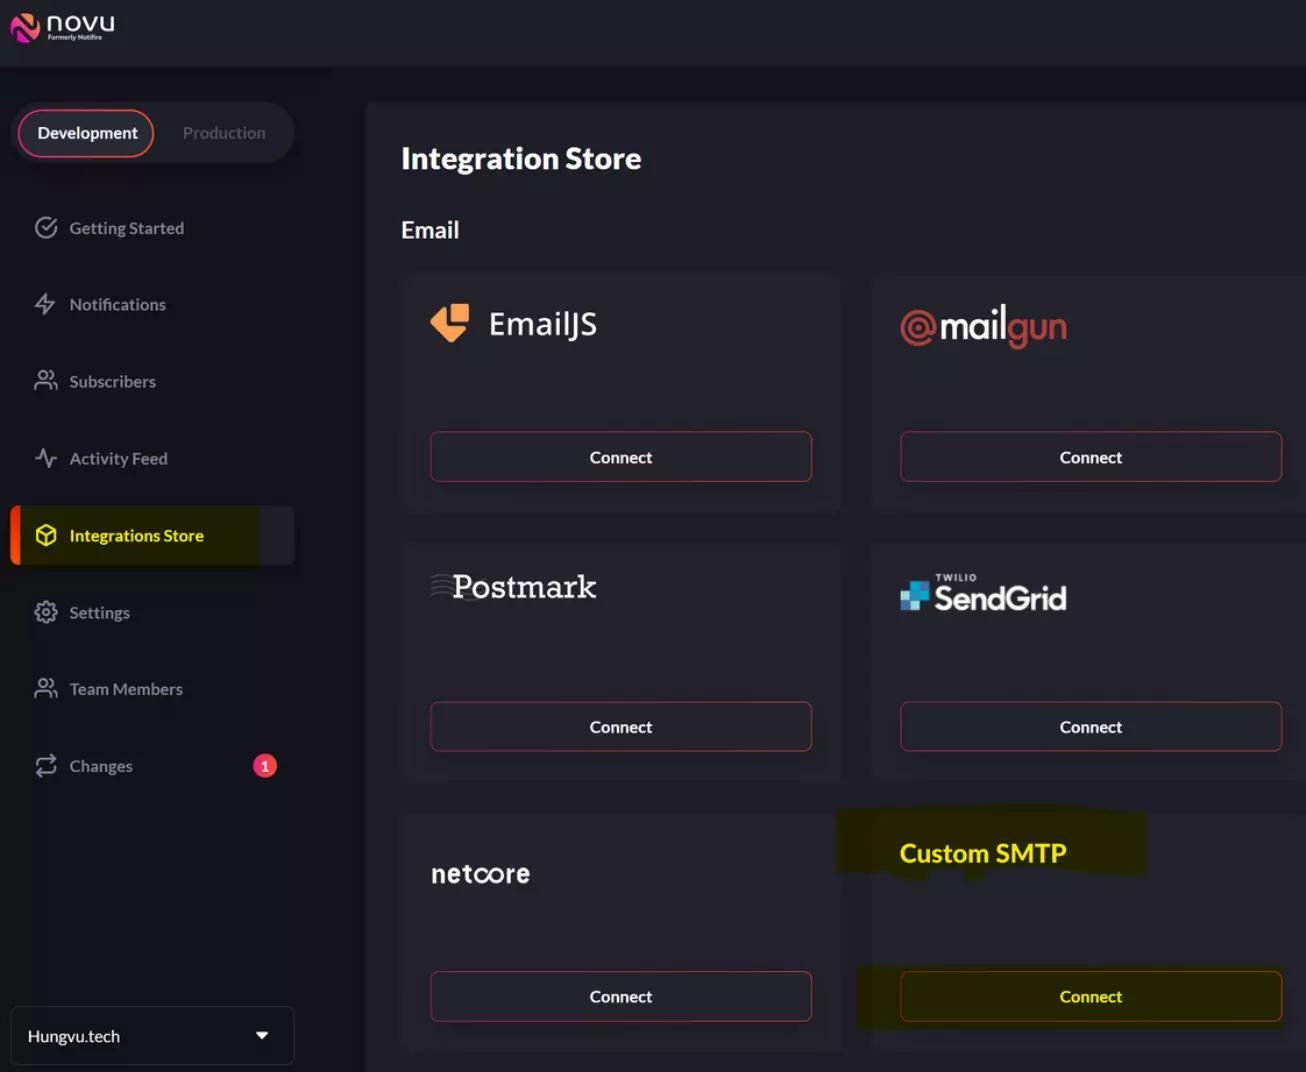
Choosing the Custom SMTP option, you need to fill out the following information:
- User - This is your Zoho Mail email address. In this case, it is
hello@hungvu.tech. - Password - This is your App Password created in the previous section. Your master password can also be used, but it fails if multi-factor authentication is enabled on the Zoho side.
- Host - This is an Outgoing Server Name retrieved in the previous section. In this case, it is
smtppro.zoho.com. - Port - There are 2 options, SSL and TLS. As TLS is preferred in email transmission, port
587is the choice. - Secure - This field is only applicable to SSL connections. Set to
truefor a secure connection. If it is set on a TLS connection, an error happens, as shown below. Leave it empty for the TLS connection.
139985482967856:error:1408F10B:SSL routines:ssl3_get_record:wrong version number:../deps/openssl/openssl/ssl/record/ssl3_record.c:331:
- DKIM: Domain name / DKIM: Private key / DKIM: Key selector - Leave empty. It appears that these fields do not need to be set for Zoho Mail assuming your DKIM was properly configured in the DNS records. Later in the article, there is proof to show that DKIM works.
- From email address - Enter your user’s email address. In most cases, it is the same as the
Userfield, which ishello@hungvu.techhere. - Sender name - Enter your preferred name. In this case, it is
Hung Vu. - Active (button) - Enable it so SMPT is included in *Novu Workflow***.**
- Verify provider credentials (button) - Enable it to get a confirmation that the SMTP configuration is working. If this button is disabled, you can only see a success message. However, when any of Novu’s functions evoke an SMTP connection, an error might show up there.
And you have just successfully set up Custom SMTP in Novu!

Create your first notification template
Now is the time to create a new Novu Notification Template. This essentially is a way for you to define the “shape”, or format of your email, alongside an associated workflow. The workflow defines how this specific template behaves, and it consists of two main parts: Triggers, and Events. Let’s establish the goal to achieve:
- Trigger: After publishing your blog article
- Events: Novu notifies users of your new article via Zoho Mail
With that said, let’s navigate to Notifications and click on the New button on the top right to create a new Notification template.
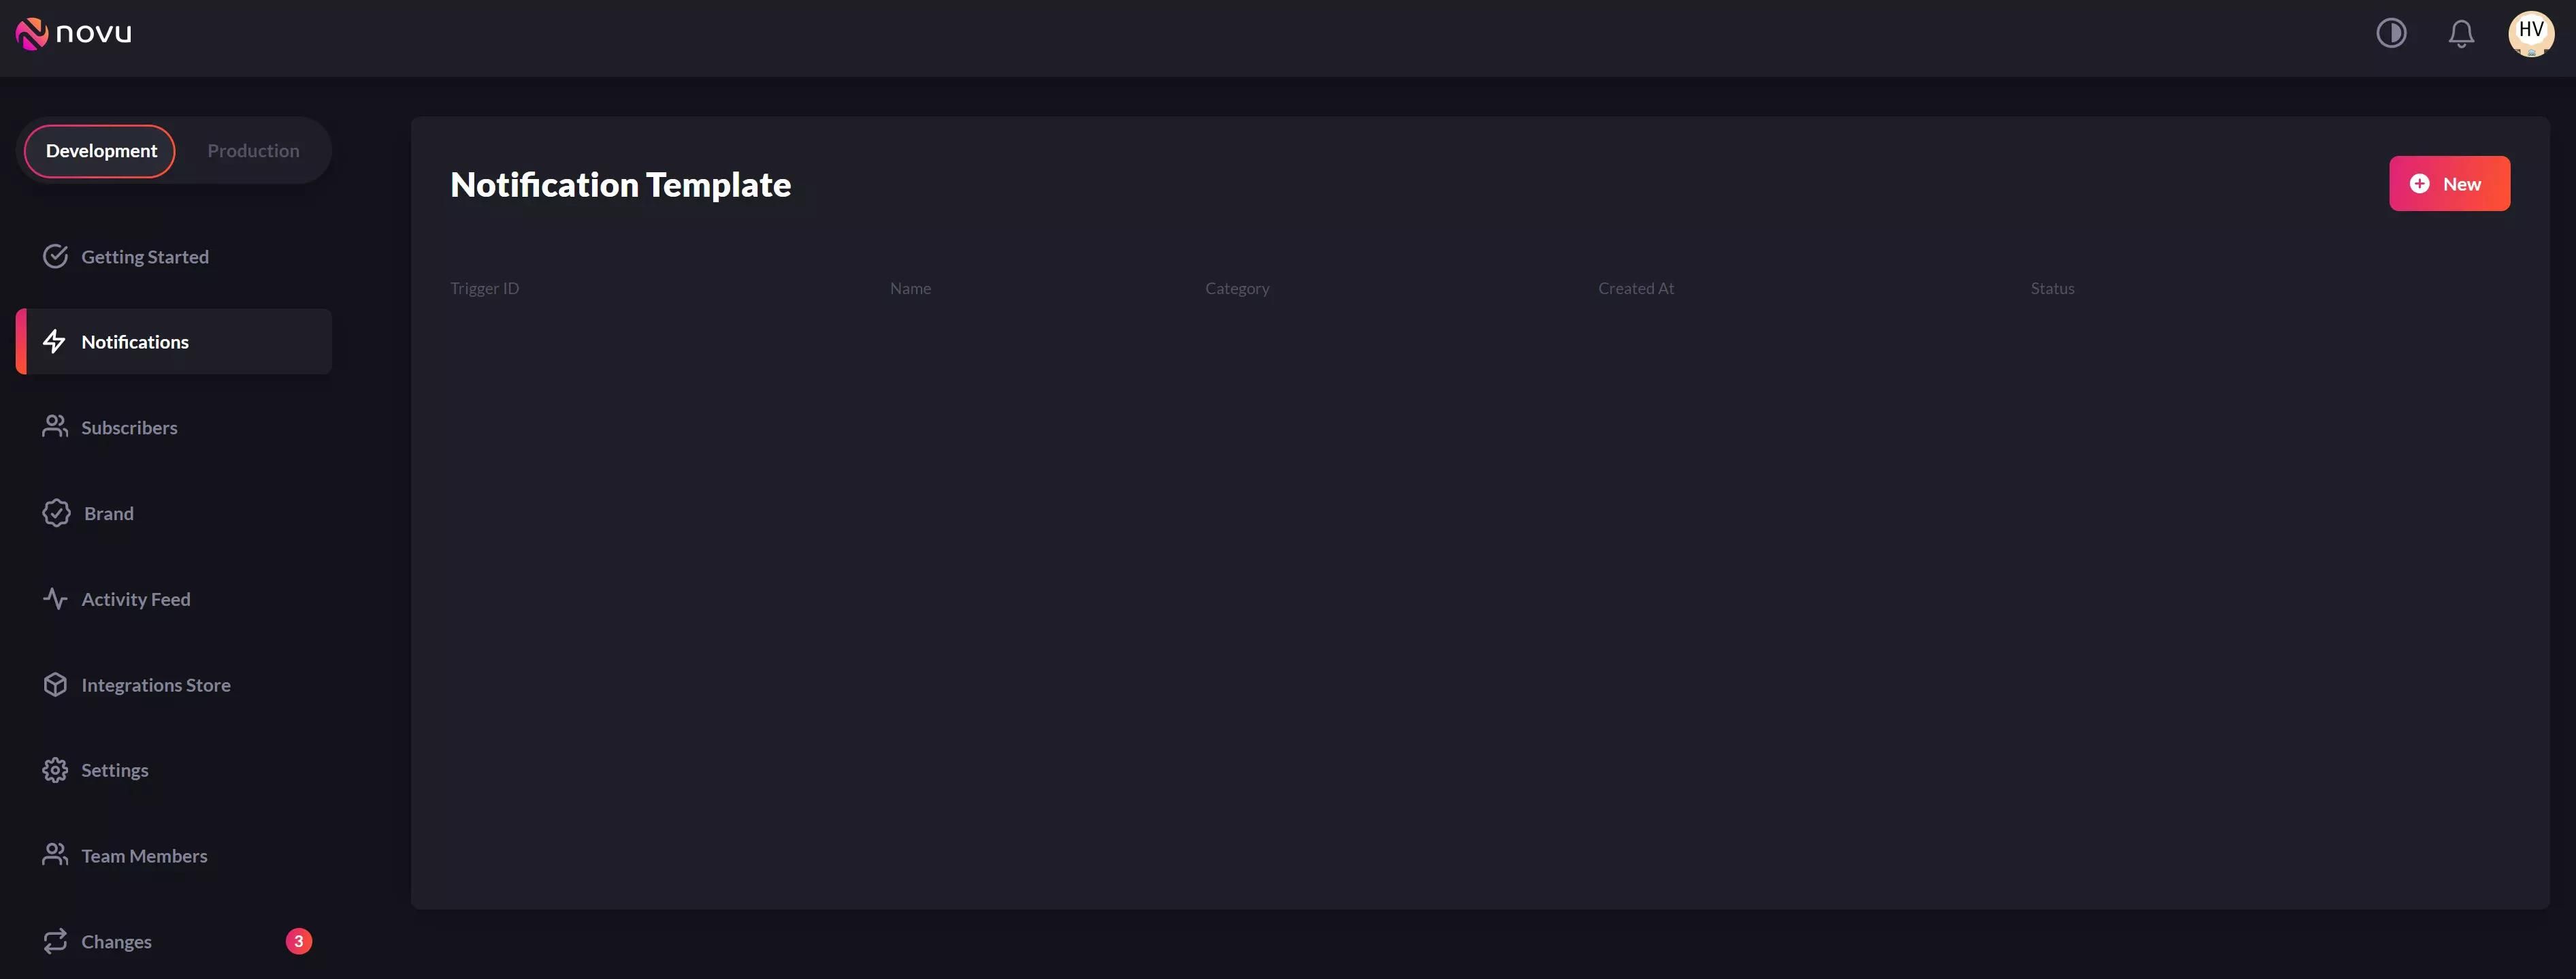
There are three sections of the template: Notification Settings, Workflow Editor, and User Preference Editor. Let’s fill them out as below.
Notification Settings
- Notification Name:
Email - New Article - Notification Description:
This is a channel for notifying about a new blog article via an email - Notification Group:
General
User Preference Editor
- Leave everything as is.
Workflow Editor
- Drag and drop an
Emailstep to the workflow. - Hover your mouse over the
Emailstep, and choose Edit Template.
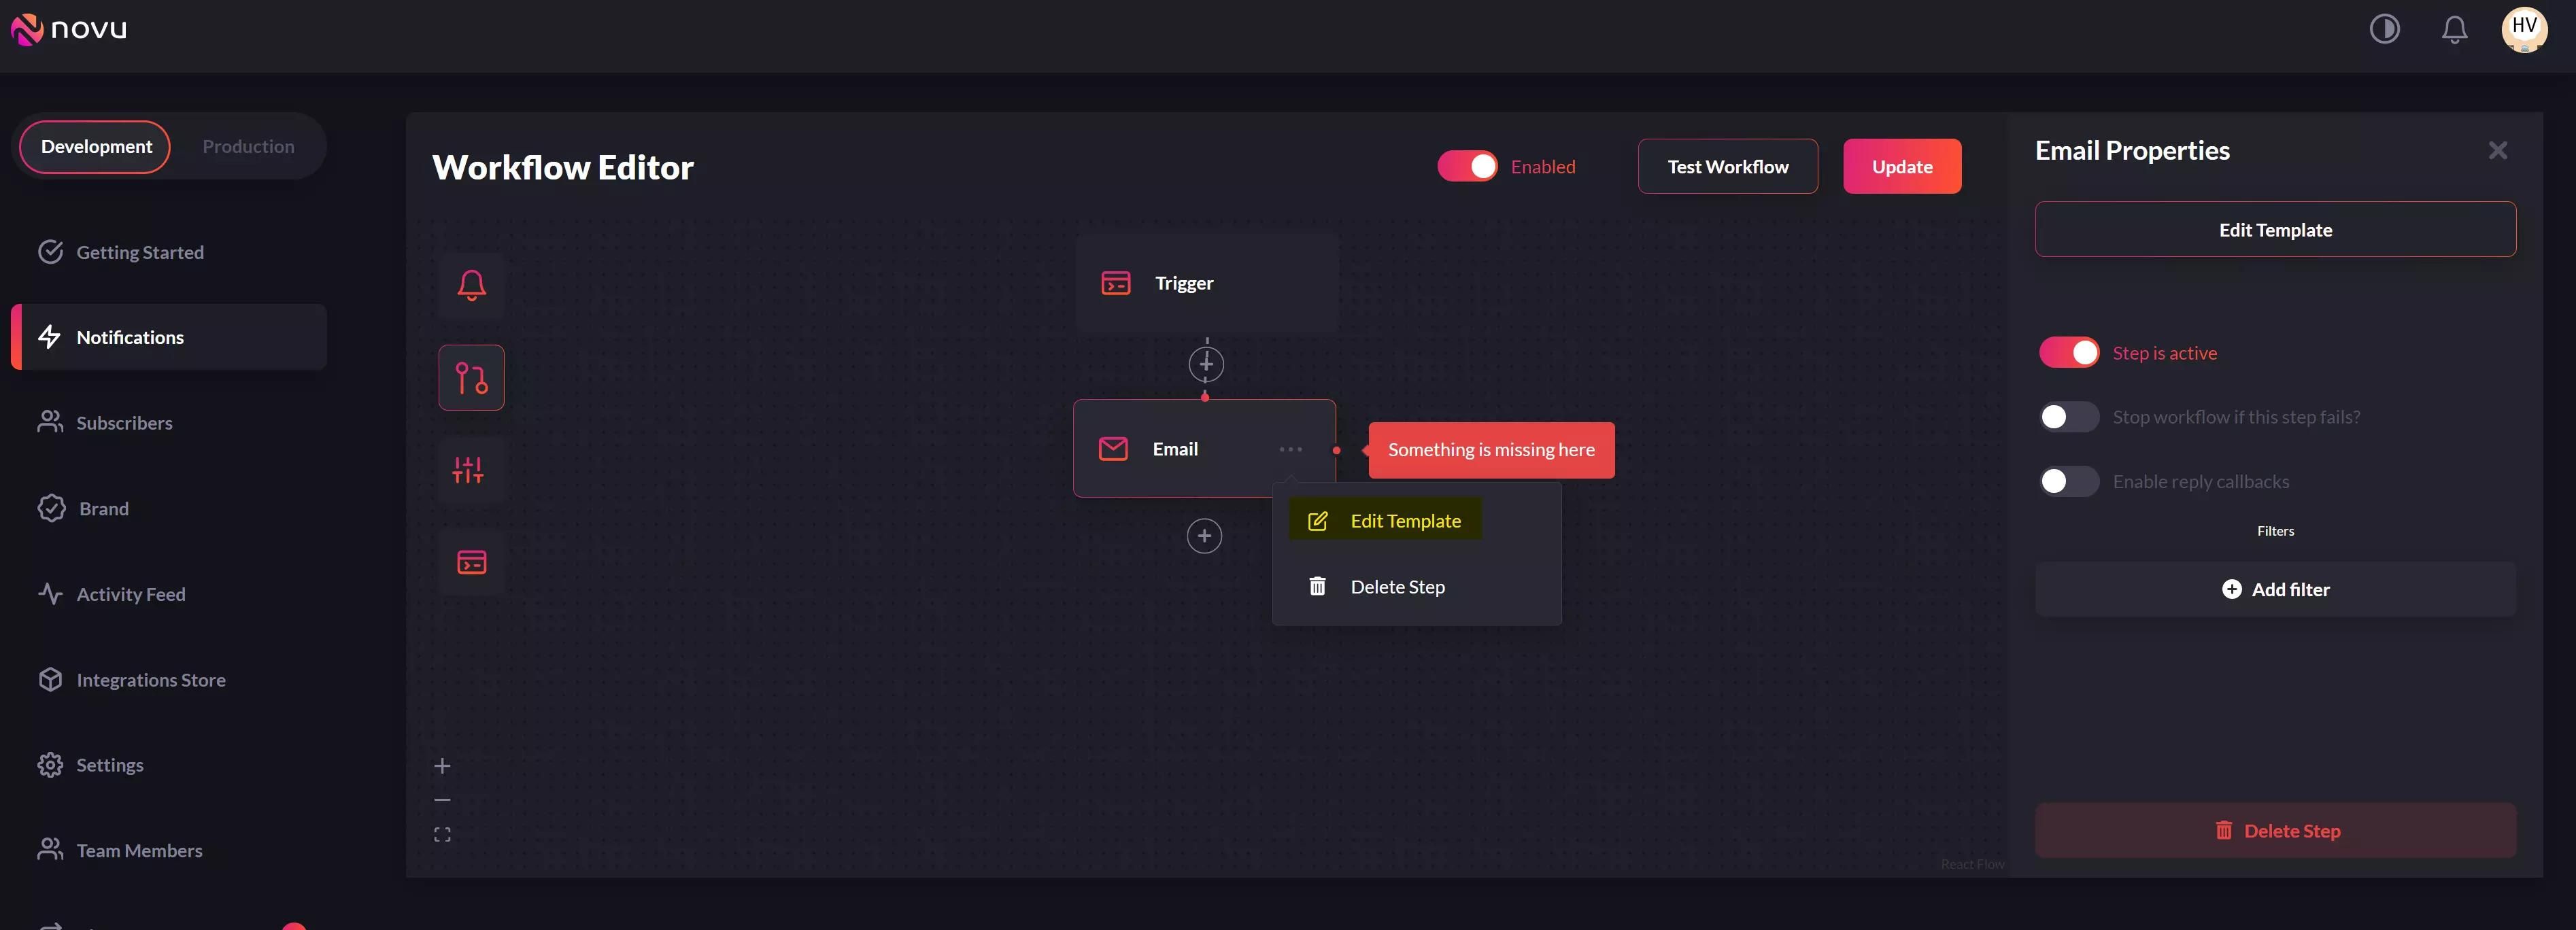
Set fields as follows:
- Email Subject:
New article is available! - Preheader: Leave empty
- Email Layout: Leave empty
{{author}} just released a new article at {{article_url}}.
Let's check it out. ❤️- Email Content: This accepts custom variables from the JSON request, and the variable is wrapped in double curly braces
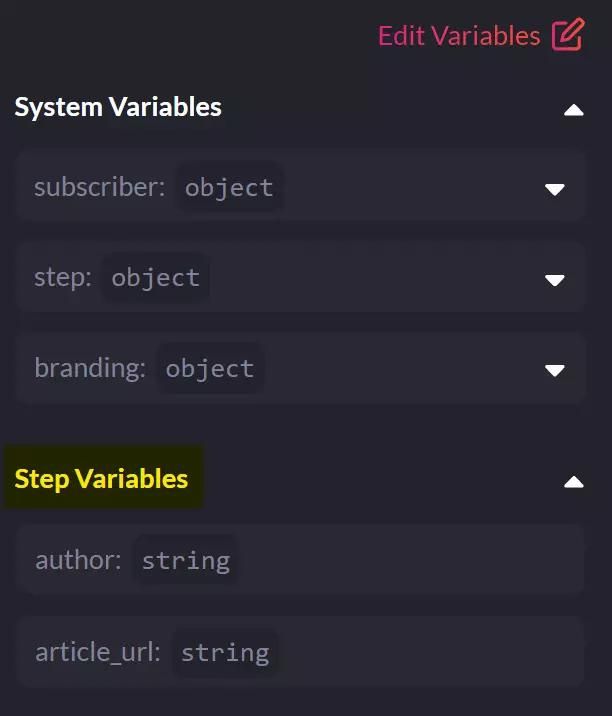
{{variables}}. With that said, the content is as below. - You should see the step variables
authorandarticle_urlappear on the right panel.A sign that variables to be used in the email template are successfully configured. - Press Update to save the workflow.
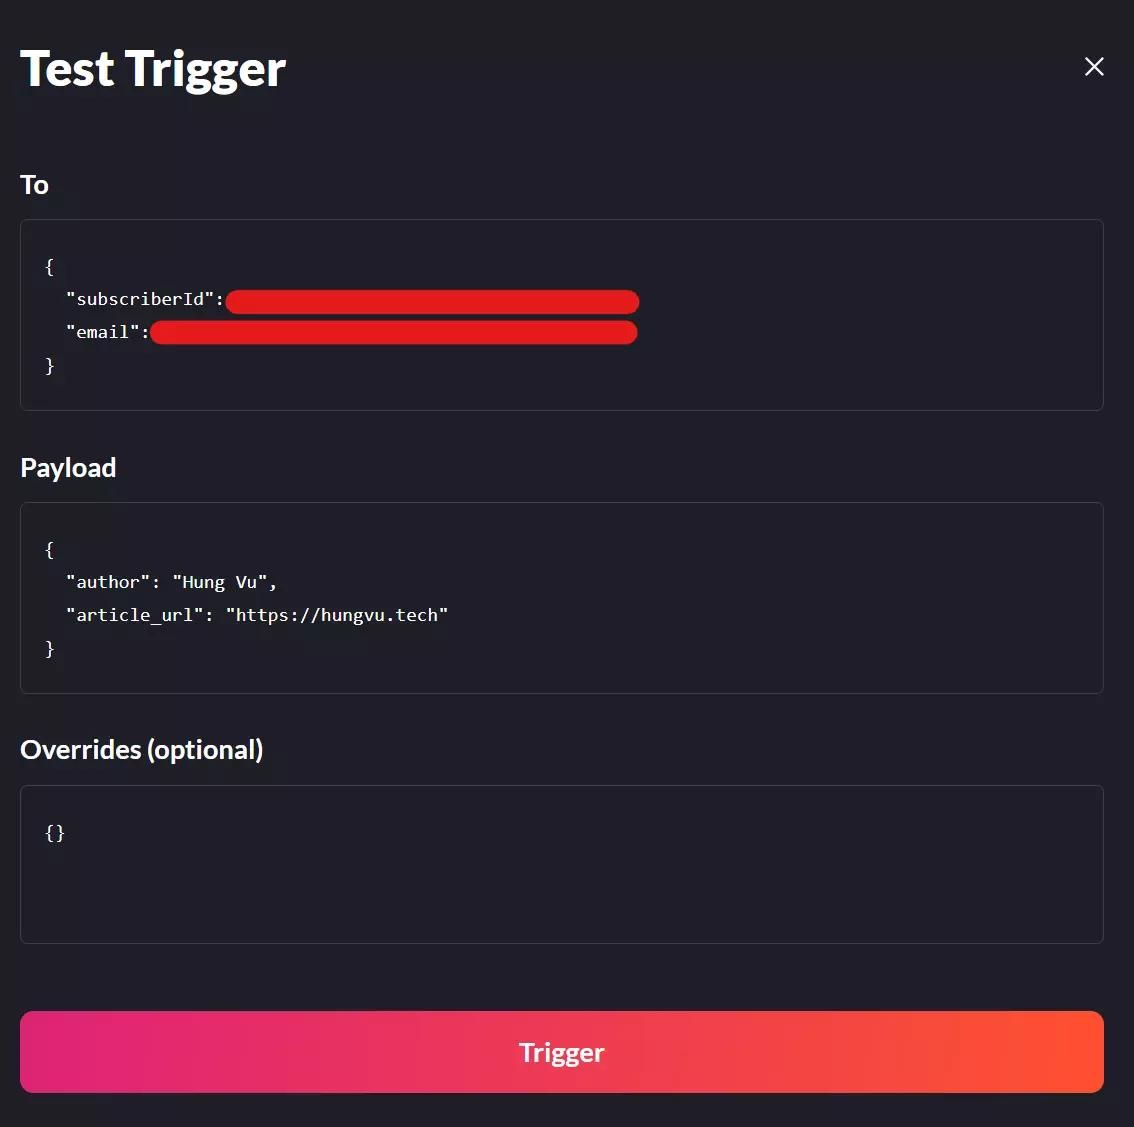
Navigate back to either Edit Template or Workflow Editor dashboard, and here, Test Workflow is available on the top right of your screen. Click on it, and you can edit the payload to trigger this Email - New Article workflow.

Note: A success here only means Novu can craft and send an email via Zoho Mail. The status delivery status can only be checked via Zoho Mail’s Sent box. As in the picture below, one of the emails is undeliverable because I typed in the wrong recipient name.

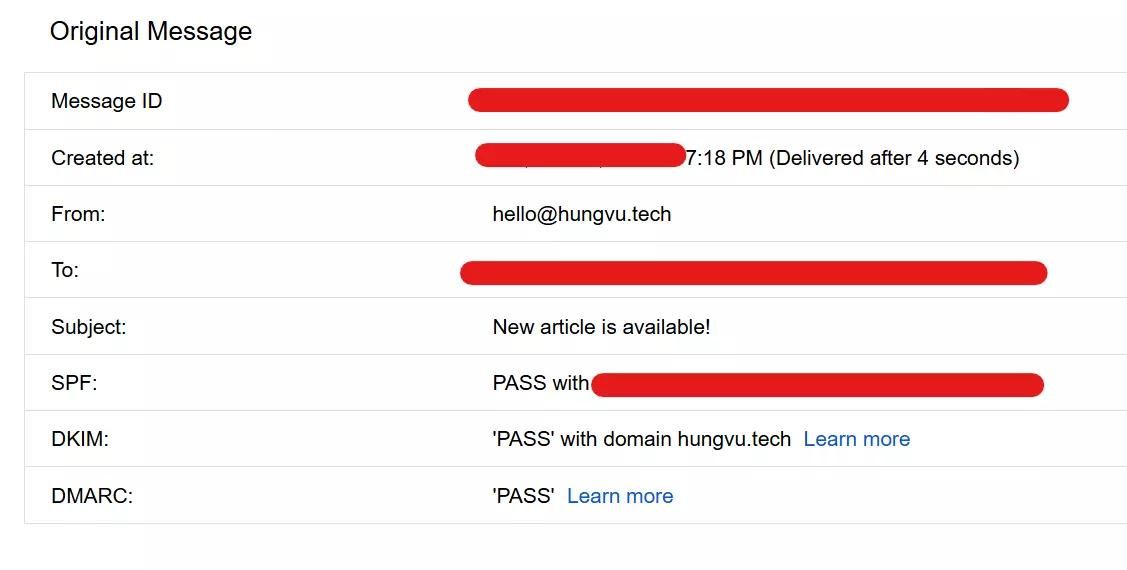
For a delivered email, it should reside in the recipient’s mailbox as seen below. Certainly, SPF and DKIM are successfully validated for this email. At this point, you have successfully set up a unified Novu API.
How to build a simple blog using Payload CMS and Next.js?
Unlike other popular CMS like Strapi, and Contentful, the Payload CMS is code-first. This infrastructure as a code approach allows users to consistently build the product and migrate between servers without worrying about human errors in configuring via GUI elements. Meanwhile, Next.js supports a wide variety of rendering strategies and is built on top of a mature React ecosystem. It has been a top choice for developers even at an enterprise scale (according to the State of JS survey), indeed, it is more than suitable for a simple blog website.
The admin dashboard of Payload CMS uses Next.js. That means you can use the same technology on both the front-end (blog website), and front-of-back-end (admin dashboard), hence reducing overhead and development time. Luckily, the Payload team has a boilerplate for integration with the CMS, and it should be a good starting point. At the moment, the boilerplate is using Next.js 12, and with the boilerplate being under active development, it might become Next.js 13 shortly and introduce many breaking changes compared to this article.
That said, as Payload CMS uses MongoDB, the database server must be configured first. It can be done easily by downloading the MongoDB Community edition. The MongoDB team provides a full installation package for many operating systems (OS), so the installation and server initiation is rather trivial.
With MongoDB out of the way, first, create a new repository using a template at payloadcms/nextjs-custom-server, and clone that to your local machine. Unlike forking, creating a new repository from a template resets the commit history and disassociates it from an original template repository.
git clone https://github.com/hunghvu/blog-website-with-novu.git
Now, navigate to the cloned repository and install the necessary packages.
# Payload CMS is using yarn for its project.
# But you can always use a package manager of your choice.
cd blog-website-with-novu
yarn install
In the boilerplate repository (root folder), there is a .env.example, create a copy of that, and name the file .env. As Payload CMS uses dotenv, which looks for a .env file by default, any other similar names like .env.local can raise an exception.
# Create a new .env file
cp .env.example .env
Assuming the MongoDB server is up and running, now you can fire up the project using.
yarn dev
However, in case you see an exception as below (which may happen on certain OS versions).
ERROR (payload): Error: cannot connect to MongoDB. Details: connect ECONNREFUSED ::1:27017
You need to modify a MONGO_URL in the .env file as below.
# Before
MONGO_URL=mongodb://localhost/payload-nextjs-site

# After
MONGO_URL=mongodb://127.0.0.1/payload-nextjs-site
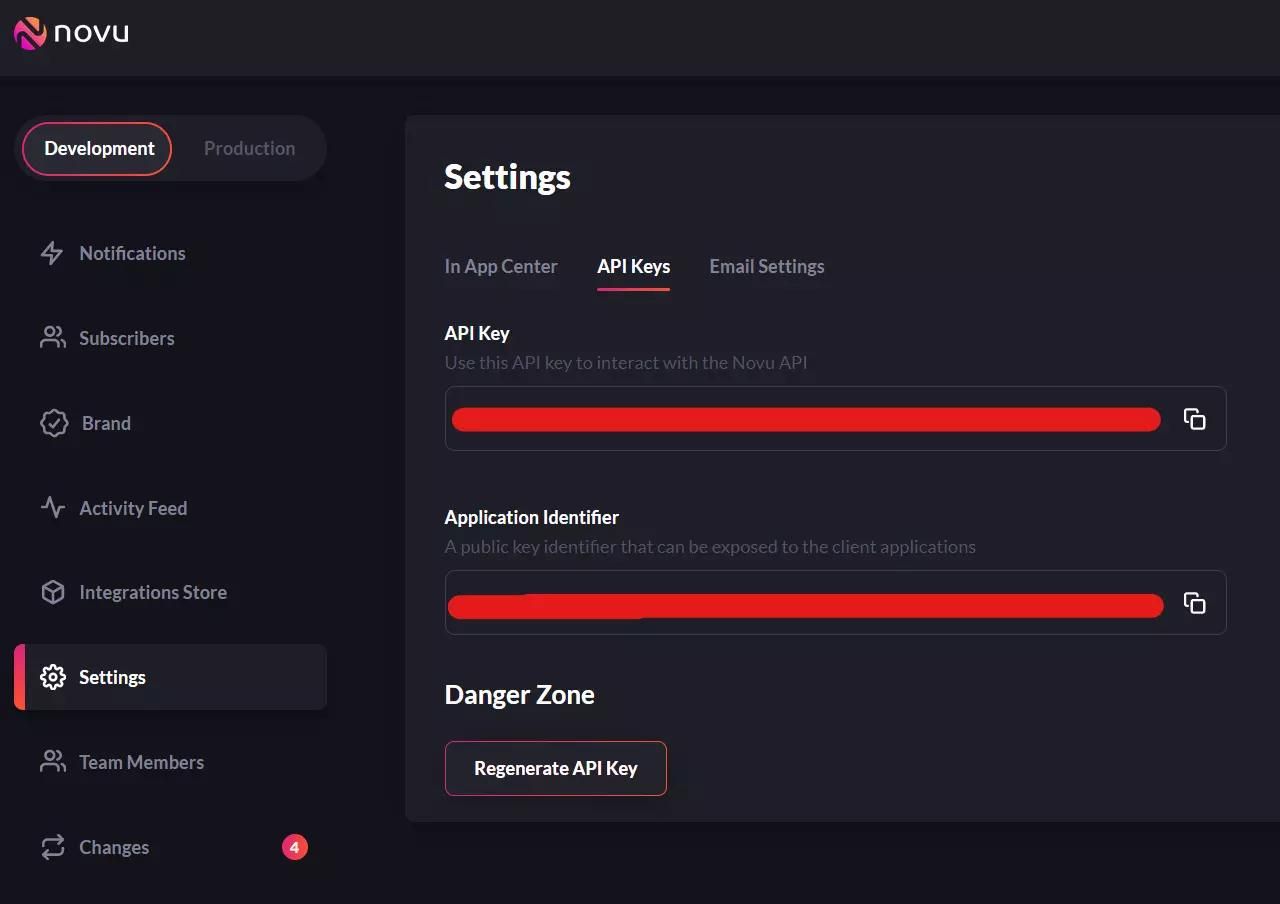
Lastly, let’s grab a Novu API key and put it in your environment file.
# Add this key to .env
NOVU_API_KEY=<Your API key>
How to create a new article in the Payload CMS admin dashboard?
When the server successfully starts, go to localhost:3000/admin to register an account and access the admin dashboard. By default, there are three collections: Pages, Media, and Users. To create a new article, let’s navigate to Pages.
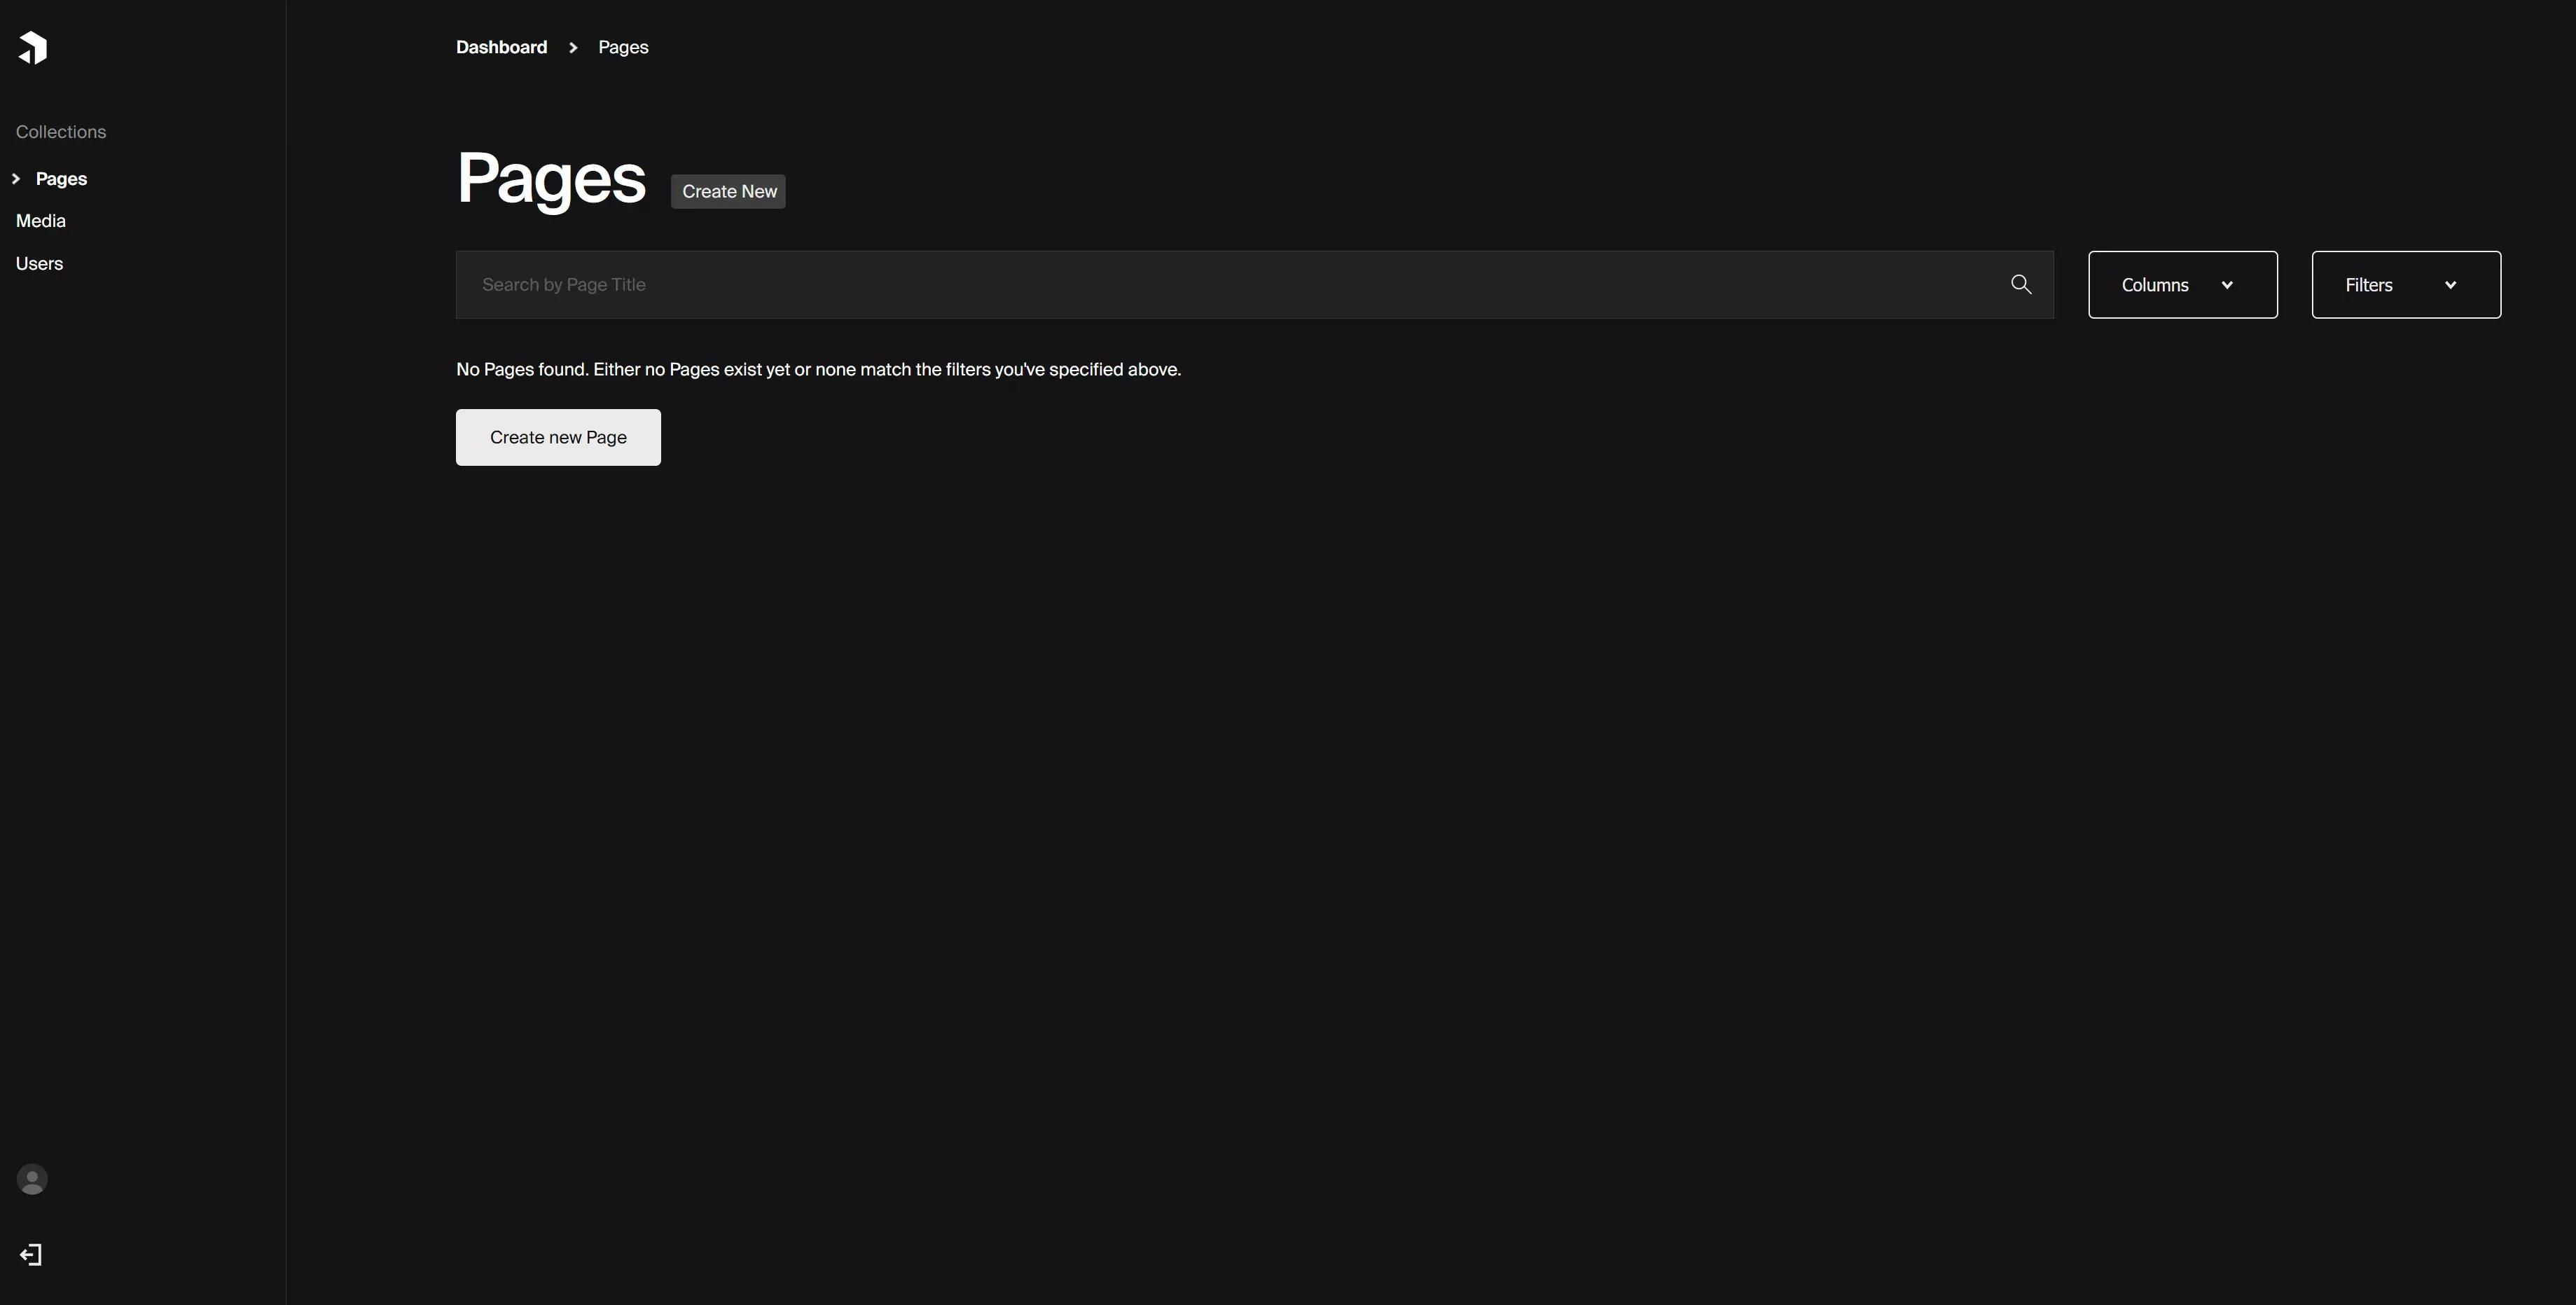
Click on Create new Page, and fill out the following information.
- Page Title:
This is your first article - Featured Image: Leave empty
- Page Layout: Choose the Content option, and let the body of your article be
This is the body of your article. I suppose this is where your writing journey begins!
- Page meta - Title:
Search engine optimization (SEO) title, and tab name - Page meta - Description:
SEO description - Page meta - Keywords:
Software engineering and technical writer blog - Page Slug: Leave empty. This by default, is created based on Page Title upon saving. In this case, it is
this-is-your-first-article, but you can always change the slug as you want
Now, save the page and navigate to localhost:3000/this-is-your-first-article.
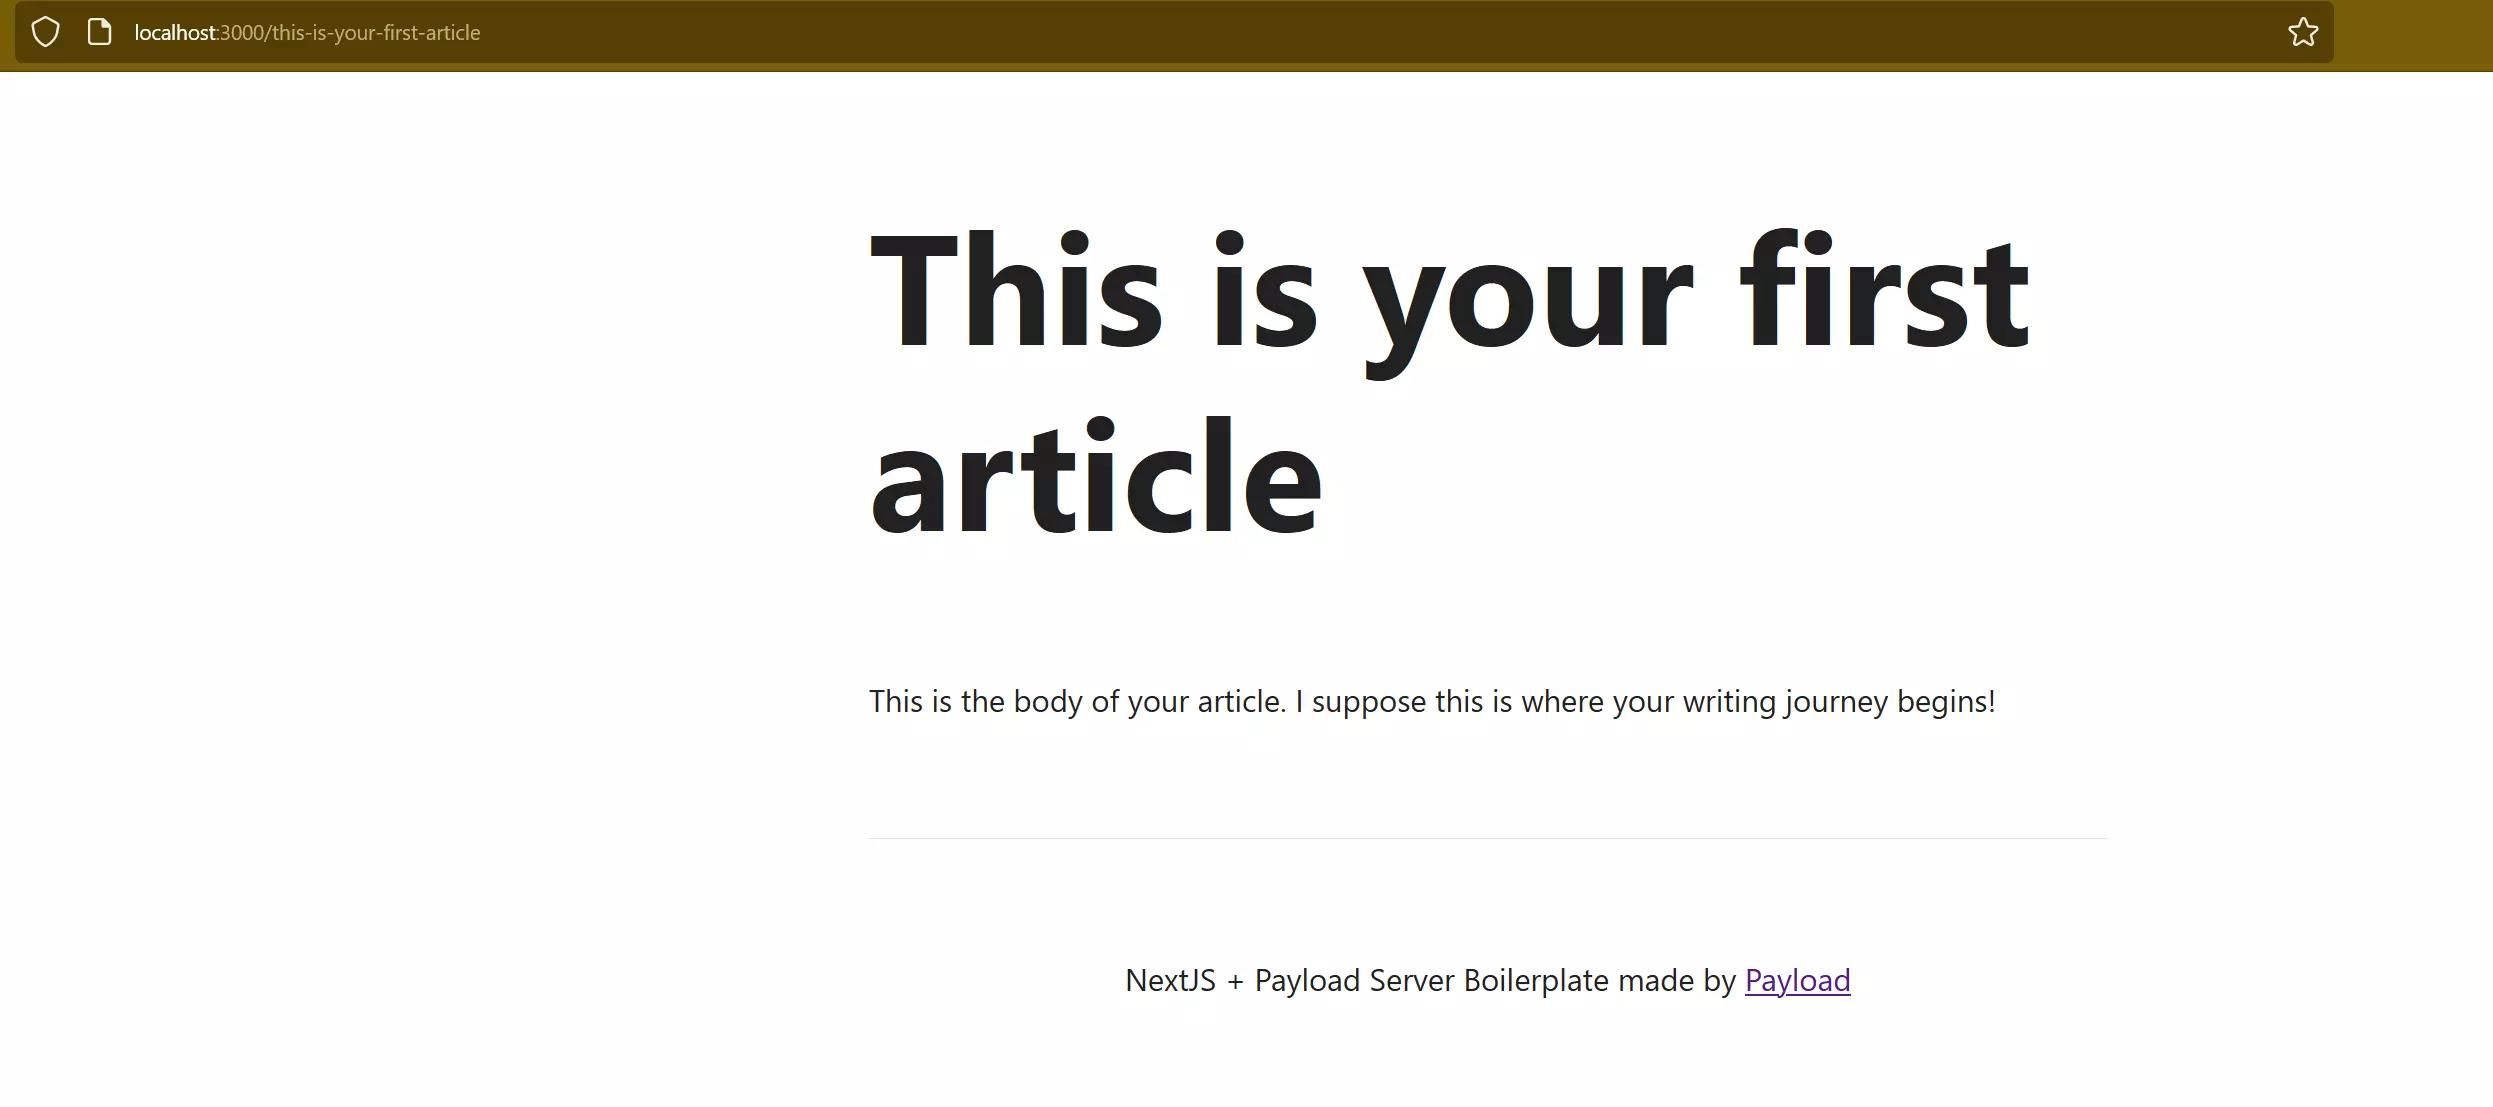
Still, Novu has not come into play yet, so now is the time to change it!
How to create newsletter subscriber collections in the Payload CMS?
Essentially, there are 2 goals to achieve:
- Create a collection for newsletter subscribers in Payload CMS. Upon user registration, deletion, and similar operations, Payload CMS makes a query to Novu and performs associated tasks.
- Create a UI element on the front end, so readers can register for your newsletter.
With that said, first install Novu’s SDK using.
yarn add @novu/node
Then, navigate to the collections folder, and create NewsletterSubscriber.ts. This file creates a collection in Payload CMS and generates a respective database schema.
// Author: Hung Vu
// This collection represents a list of subscriber information.
// The list is intended to be used for newsletter emails.
import { CollectionConfig } from "payload/types";
import { Novu } from "@novu/node";
const novu = new Novu(process.env.NOVU_API_KEY);
export const NewsletterSubscriber: CollectionConfig = {
slug: "newsletter-subscribers",
admin: {
useAsTitle: "email",
},
access: {
// Public user can subscribe.
// By default, all other operations like "read", "update", etc. are restricted
// to only authorized users.
create: () => true,
},
fields: [
{
// Payload CMS also allows field validation,
// This should be done in production code to avoid spam.
name: "email",
label: "Subscriber Email",
type: "text",
required: true,
unique: true,
},
],
hooks: {
// It is the best to move these to "utilities",
// and have an appropriate error handler in production code.
afterChange: [
(args) => {
const operation = args.operation;
const email = args.doc.email;
const internal_id = args.doc.id;
// Create and update subscriber, Novu recommends the use of internal id.
// Source: https://docs.novu.co/platform/subscribers
operation === "create"
? novu.subscribers
.identify(internal_id, { email })
.catch((err) => console.error(err))
: operation === "update"
? novu.subscribers
.update(internal_id, { email })
.catch((err) => console.error(err))
: null;
},
],
afterDelete: [
(args) => {
// Delete subscriber
const internal_id = args.doc.id;
novu.subscribers.delete(internal_id).catch((err) => console.error(err));
},
],
},
};
export default NewsletterSubscriber;In payload.config.ts, modify it as follows.
// Author: Hung Vu
import { buildConfig } from "payload/config";
import dotenv from "dotenv";
import Page from "./collections/Page";
import Media from "./collections/Media";
import NewsletterSubscriber from "./collections/NewsletterSubscriber";
dotenv.config();
export default buildConfig({
serverURL: process.env.PAYLOAD_PUBLIC_SERVER_URL,
collections: [
Page,
Media,
// Make Payload CMS aware of the new collection.
NewsletterSubscriber,
],
});On the front end, create a newsletter registration component in components/NewsletterRegistration/index.tsx.
// Author: Hung Vu
// This component allows readers to subscribe to the newsletter.
import React from "react";
const NewsletterRegistration: React.FC = () => {
const [readerEmail, setReaderEmail] = React.useState<string>();
const submit = async () => {
try {
// Remember to handle exceptions and status code in the production code.
await fetch("http://localhost:3000/api/newsletter-subscribers/", {
method: "POST",
headers: {
"Content-Type": "application/json",
},
body: JSON.stringify({
email: readerEmail,
}),
});
} catch (err) {
console.error(err);
}
};
return (
<form
style={{
display: "flex",
flexDirection: "column",
marginBottom: "32px",
}}
onSubmit={(event) => {
// There is "TypeError: NetworkError when attempting to fetch resource." without the preventDefault() statement.
event.preventDefault();
submit();
}}
>
<label htmlFor="newsletter">Subscribe to newsletter</label>
<input
id="newsletter"
type="text"
placeholder="Enter your email"
onChange={(event) => setReaderEmail(event.target.value)}
/>
<input type="submit" value="Subscribe" />
</form>
);
};
export default NewsletterRegistration;And enable this component in the footer section at pages/[...slug].tsx
// Import, and add this to line 52.
<NewsletterRegistration />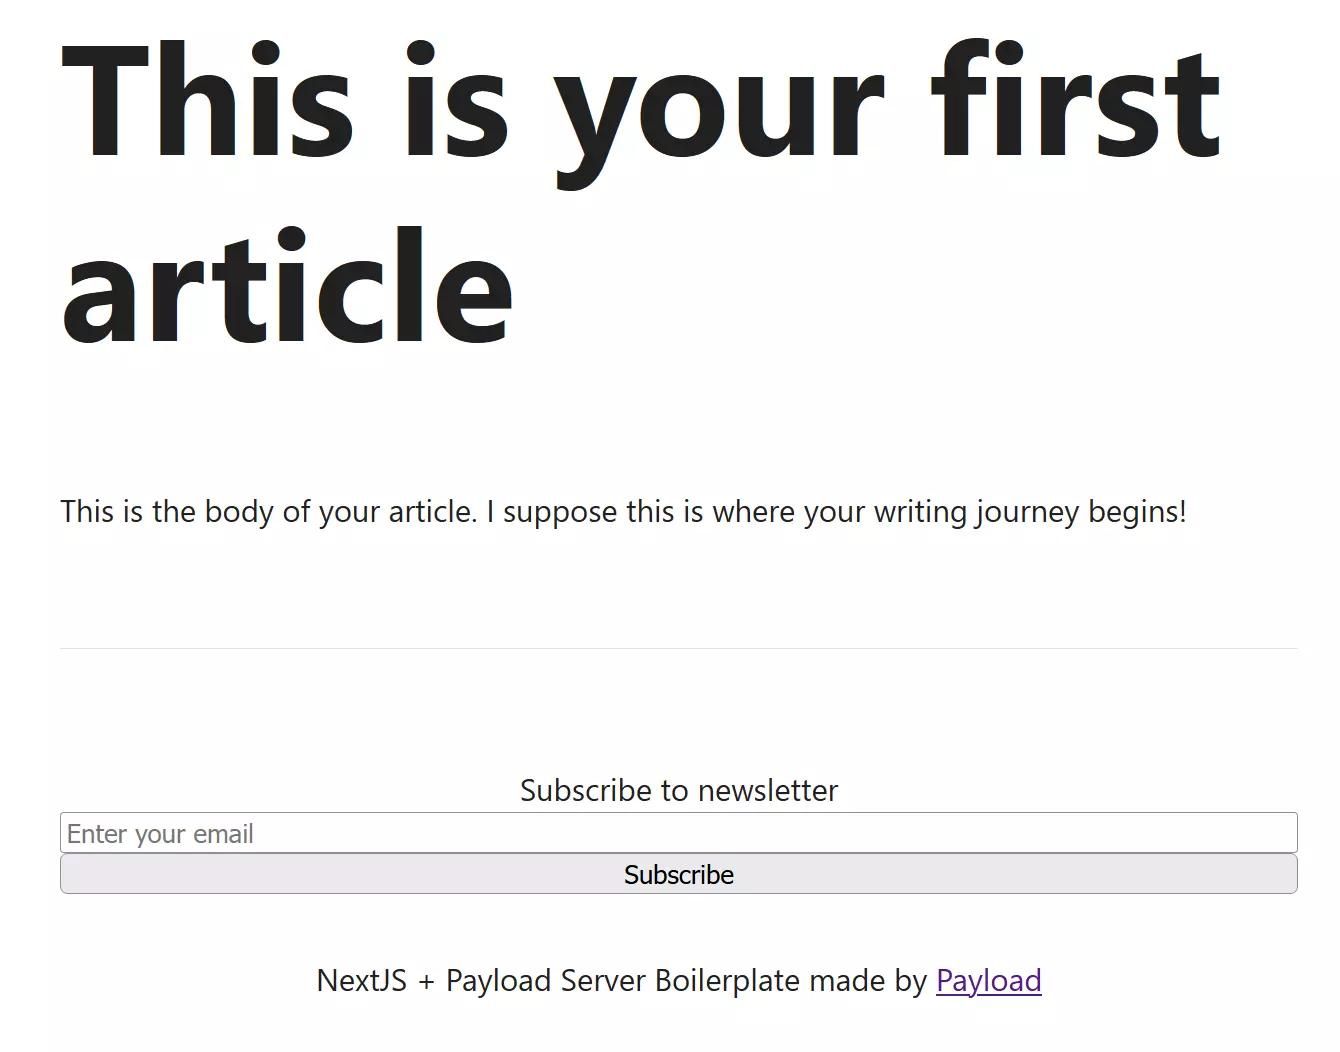
How to send a newsletter to your subscribers?
At this stage, you have an article and a list of subscribers in hand already. Therefore, how can you let the subscribers know about your new publishment? Well, the approach is the same as linking a NewsletterSubscriber collection and Novu, meaning, this time you need to link the Page collection and Novu using a collection hook in Payload CMS.
Navigate to collections/Page.ts and modify it as follow.
// Author: Hung Vu
// This blog article collections notifies newsletter
// subscribers whenever a new article is released.
import { CollectionConfig } from "payload/types";
import { MediaType } from "./Media";
import formatSlug from "../utilities/formatSlug";
import { Image, Type as ImageType } from "../blocks/Image";
import { CallToAction, Type as CallToActionType } from "../blocks/CallToAction";
import { Content, Type as ContentType } from "../blocks/Content";
import payload from "payload";
import { Novu } from "@novu/node";
const novu = new Novu(process.env.NOVU_API_KEY);
export type Layout = CallToActionType | ContentType | ImageType;
export type Type = {
title: string;
slug: string;
image?: MediaType;
layout: Layout[];
meta: {
title?: string;
description?: string;
keywords?: string;
};
};
export const Page: CollectionConfig = {
slug: "pages",
admin: {
useAsTitle: "title",
},
access: {
read: (): boolean => true, // Everyone can read Pages
},
fields: [
{
name: "author",
label: "Author name",
type: "text",
required: true,
},
{
name: "title",
label: "Page Title",
type: "text",
required: true,
},
{
name: "image",
label: "Featured Image",
type: "upload",
relationTo: "media",
},
{
name: "layout",
label: "Page Layout",
type: "blocks",
minRows: 1,
blocks: [CallToAction, Content, Image],
},
{
name: "meta",
label: "Page Meta",
type: "group",
fields: [
{
name: "title",
label: "Title",
type: "text",
},
{
name: "description",
label: "Description",
type: "textarea",
},
{
name: "keywords",
label: "Keywords",
type: "text",
},
],
},
{
name: "slug",
label: "Page Slug",
type: "text",
admin: {
position: "sidebar",
},
hooks: {
beforeValidate: [formatSlug("title")],
},
},
],
hooks: {
afterChange: [
async (args) => {
const author = args.doc.author;
const urlSlug = args.doc.slug;
const operation = args.operation;
try {
// Using local API bypasses the access control rules.
// This is a way to retrieve records from other collections internally.
// Also, async/await can be used in hooks
// Source: https://payloadcms.com/docs/local-api/overview
const newsletterSubscriberList = (
await payload.find({
collection: "newsletter-subscribers",
})
).docs;
// This triggers only on "create"
if (operation === "create") {
newsletterSubscriberList.forEach((subcriber) => {
const email = subcriber.email;
const internalId = subcriber.id;
novu.trigger("email-new-article", {
to: {
subscriberId: internalId,
email: email,
},
payload: {
author: author,
// The url is hard-coded only for demonstration purpose
article_url: `http://localhost:3000/${urlSlug}`,
},
});
});
}
} catch (err) {
console.error(err);
}
},
],
},
};
export default Page;You may wonder why novu is re-initialized here. If it is created in server/index.ts and shared with other locations, an exception happens, as shown below.
BREAKING CHANGE: webpack < 5 used to include polyfills for node.js core modules by default.
This is no longer the case. Verify if you need this module and configure a polyfill for it.
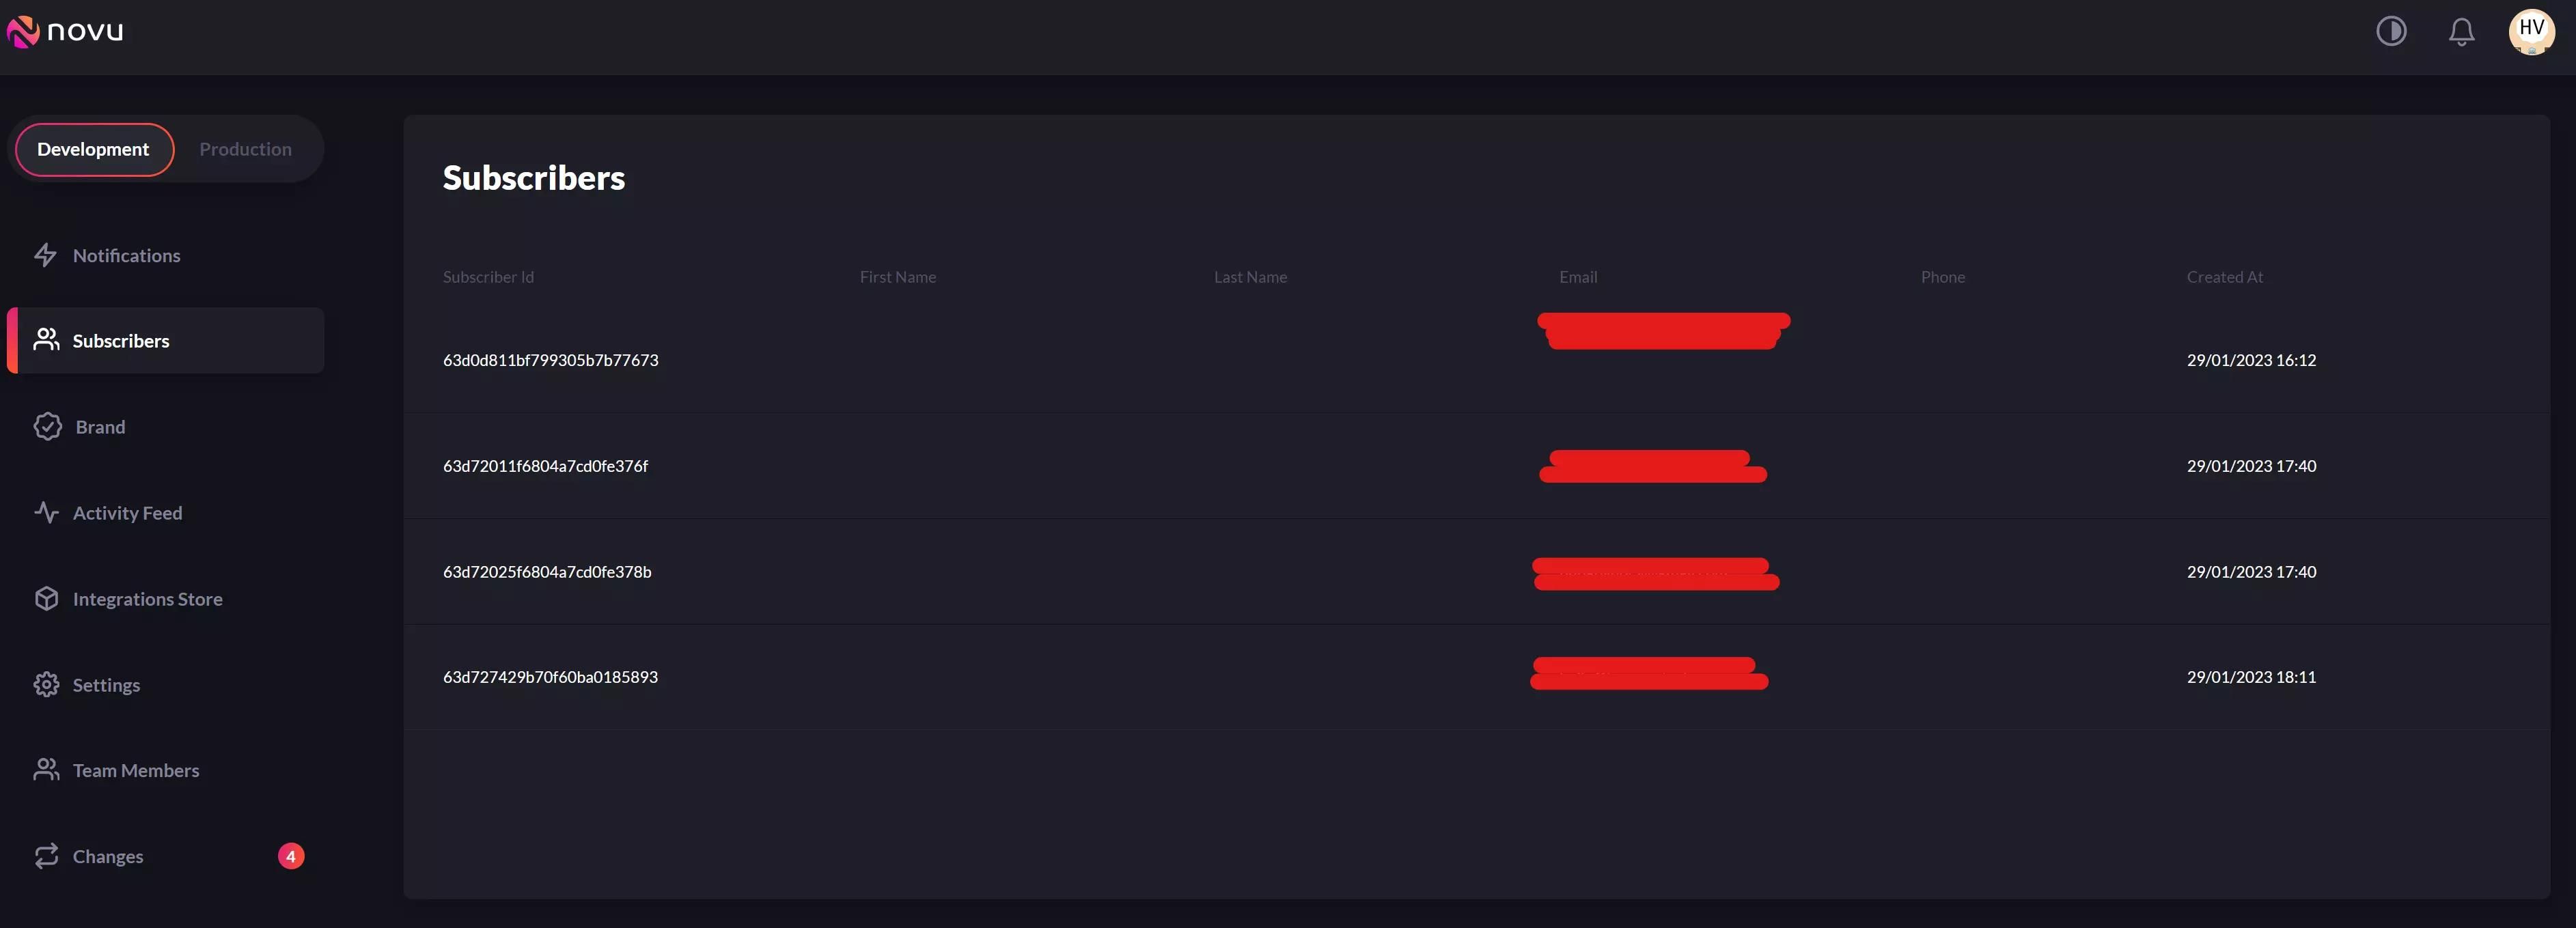
Novu perhaps is using a singleton pattern when initializing the instance, so it should be fine, and indeed, here are the results.

Wrap up
In this article, you have learned and achieved several goals:
- Set up Zoho Mail.
- Know Novu’s capabilities and integration with Zoho Mail via SMTP.
- Bootstrap a simple Next.js/Payload CMS project.
- Integrate Novu to Payload to create a standard workflow for notifying your blog subscribers about new articles.
Certainly, Novu’s capabilities are not limited to just that. There is much more that you can achieve with a powerful notification workflow in Novu.
Also, don’t forget to check out the code repository of this tutorial on GitHub, and feel free to reach out to Novu’s team via Discord whenever you have any questions about this excellent open-source notification infrastructure for developers!
If you find this article to be helpful, I have some more for you!
- How to set up Bitwarden Enterprise SSO via OIDC with Google?
- Cloudflare Turnstile and Wordfence 2FA break WordPress login flow, how to fix it?
- How to back up Microsoft 365 with Synology Active Backup?
And, let’s connect!