Posted on:
Bootstrap a simple back end with a user notification feature using Novu and Amplication
In this project, I'll be showing you some unique ways to integrate Novu with Amplification, a BaaS platform, to create a simple back-end PoC.
TL;DR
In this project, I’ll be showing you some unique ways to integrate Novu with Amplification, a BaaS platform. With it, I’ll show you some interesting ways to leverage Novu’s open-source notification platform.
Amping It Up to Eleven
Building the complex software of today’s world is no easy task. A recent trend to help developers create these new applications is low-code and no-code, tools that can generate code automatically.
Not only can these tools help non-developers create applications, they can also massively boost the productivity of a developer. These tools can help rapidly set up and create applications without needing to hand-code every aspect of an application.
In this article, I’ll be showing you how to leverage one of these tools, Amplification, alongside a powerful open-source notification platform in Novu.
The Tech
If you already know what Novu and Amplication are, that’s great! For those who don’t, let me introduce you to the tip of the low-code solution iceberg.
What is Novu?
Novu is an MIT-licensed open-source notification infrastructure that empowers developers to send and manage notifications seamlessly across various channels and platforms. Its unified interface simplifies the process of delivering notifications through email, SMS, push notifications, and other channels.
Developed using cutting-edge technologies like Node.js, MongoDB, and Redis, Novu boasts exceptional scalability and reliability. With features such as notification templates and scheduled notifications that can be defined via the graphical user interface, Novu provides an exceptional developer experience even in a fast pace environment.
Using Novu can save developers considerable time and effort that would otherwise be spent building and managing a notification infrastructure. When your project scales and contains dozens of SDKs only for the messaging module, it can create unnecessary complexity in management. Without the use of Novu, you have to develop integration and interaction between different channels on your own.
On the theme of trying to speed up the development process while still maintaining the quality of your final product, backend-as-a-service (BaaS) is also a concept you must know about.
What is backend-as-a-service (BaaS)?
Backend-as-a-Service (BaaS) is a model that provides developers with a pre-built backend infrastructure to create multi-platform applications. Pre-built infrastructure is one thing, but you can also define your architecture on several aspects such as databases, and API access control lists via a friendly graphical user interface. By abstracting away the complexities of managing server-side infrastructure, BaaS platforms empower developers to focus on crafting exceptional user experiences on the front end.
BaaS providers offer an array of backend services such as user authentication, database management, file storage, … and the list goes on. Whatever tasks are usually done on the backend, then a BaaS can achieve that in a low-code manner. These services can be easily integrated into an application using APIs or software development kits (SDKs).
BaaS is particularly valuable for startups and small businesses with limited resources that seek to develop applications quickly and efficiently. It eliminates the need for building and maintaining their backend infrastructure, which can be both costly and time-consuming.
Nevertheless, BaaS generally has some drawbacks, mainly flexibility and control of your codebase (e.g., for performance optimization). BaaS is an abstraction for barebone back-end development, so it is a trade-off. Also, using a BaaS platform could increase dependency on third-party services as most are cloud-based, meaning availability and low-level security control are not in your hand.
However, no need to be disappointed, because Amplication is here to resolve those drawbacks.
What is Amplication?
Amplication is a revolutionary Apache 2.0-licensed open-source platform that simplifies the development process by automating the creation of functional, human-readable, and editable services based on TypeScript and Node.js. By generating the boilerplate code, Amplication allows developers to focus on building their core product, rather than worrying about the underlying infrastructure. Besides, its efficient automation not only saves developers a considerable amount of time and effort but also allows them to make changes quickly and easily. This ensures that developers can respond to evolving needs and requirements promptly and efficiently.
Like many other BaaS products, Amplication offers features like data modeling, user authentication, and access control, Amplication offers a comprehensive solution for building web, mobile, and desktop applications and APIs. However, what makes Amplication truly exceptional and eliminate common BaaS drawback is its ability to produce code that is not only fully functional but also easily understandable and customizable, making it an excellent tool for developers of all skill levels.
Typically, most BaaS products are cloud-based, so when you develop software using their services, you are effectively locked in their wall-garden ecosystem and have little control of the underlying mechanism. In a sense, this is to be expected because BaaS is supposed to abstract away the technical parts. However, while Amplication is doing the same, the generated codebase and self-hosted options allow you to keep the whole infrastructure in your hand.
Integrate Amplication with Novu
Now, why is Novu needed, you may ask? Amplication is there to generate all of your backend infrastructure. With notification as a common feature in modern applications, it should be a part generated by Amplication, or is it?
What is a sample use case of Amplication?
Imagine a startup that specializes in selling sustainable fashion products online. As an e-commerce business, they need a reliable and scalable backend infrastructure to manage their product catalog, customer data, and orders. However, the startup’s small team lacks the resources and expertise to build a custom backend infrastructure from scratch.
That’s where Amplication comes in. Using Amplication’s visual editor, the startup’s development team can quickly generate a custom backend infrastructure that meets their specific needs. They can easily create services for product management, order processing, payment processing, and customer management. The codebase for this service is then generated and can be version controlled and synced to GitHub so the team has a formal commit tree to follow through, thus enabling rolling back the development when breaking bugs happen.
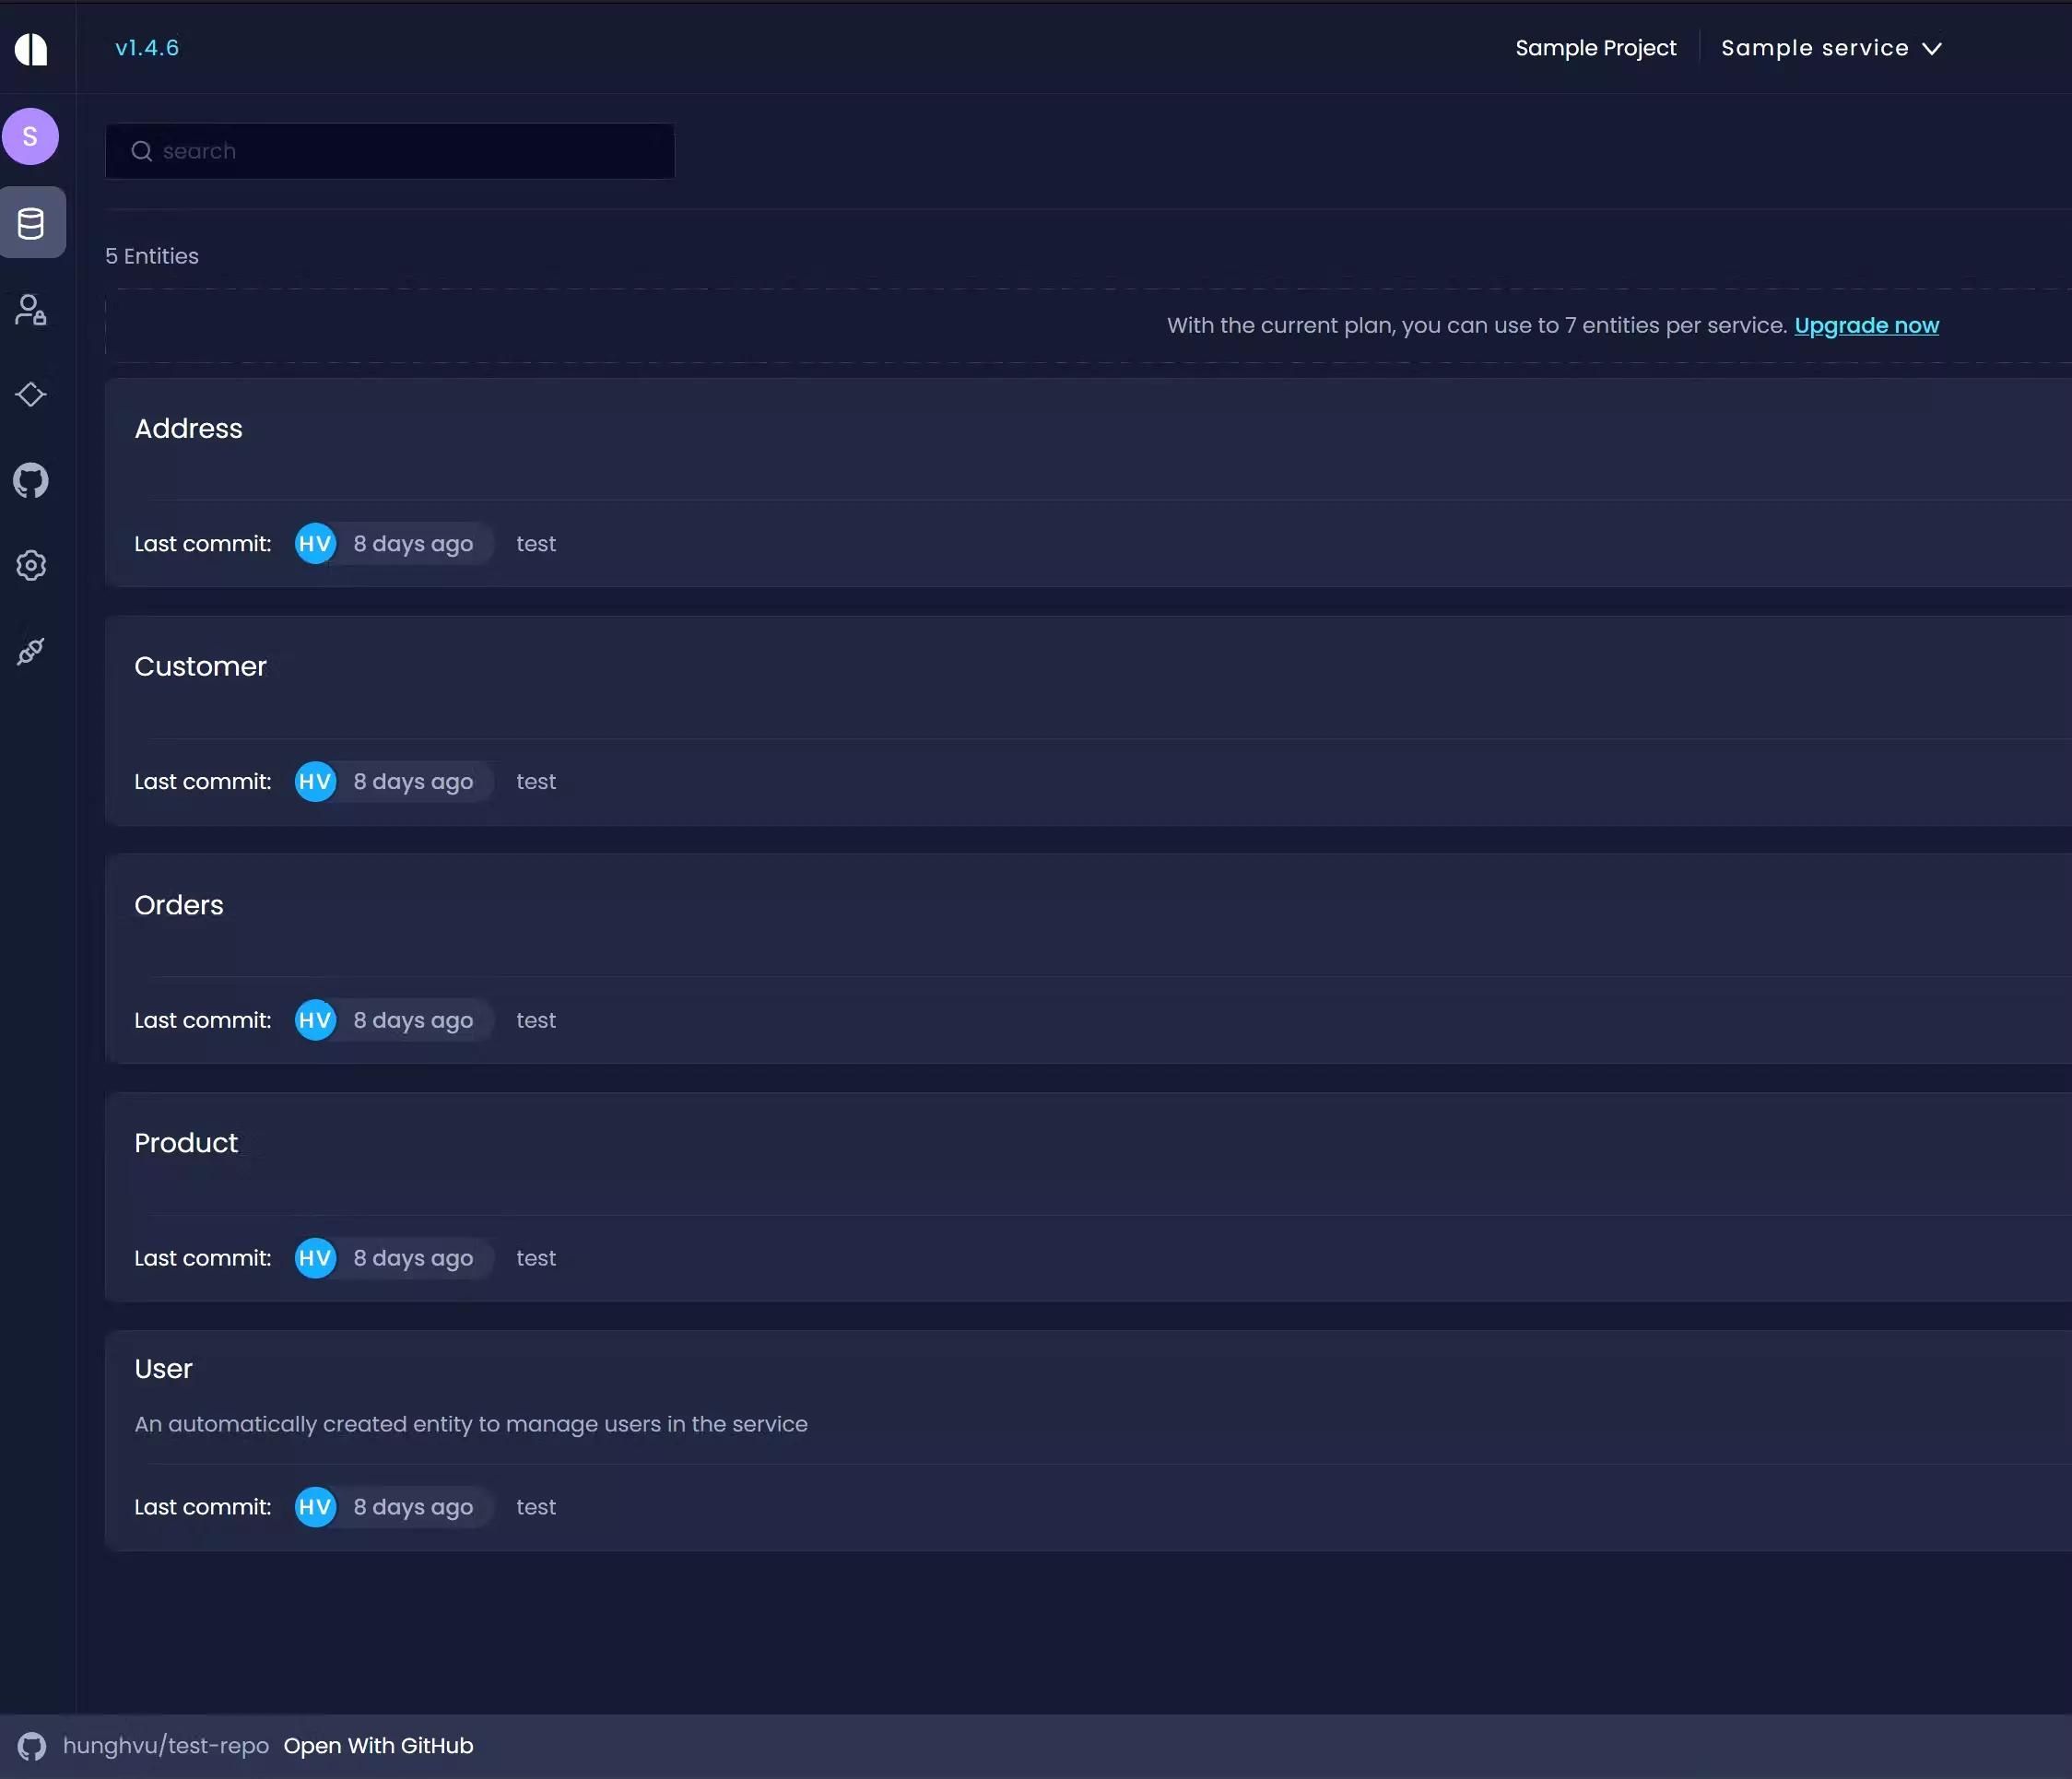
With Amplication, the startup can focus on building its storefront or social media outreach effort, knowing that the backend infrastructure is secure, scalable, and customizable. One thing to note, Amplication can generate most of the core codebase, that said, its scope (at default) is limited to:
- Database (e.g., PostgreSQL, MongoDB)
- Access control
- API (REST, GraphQL)
- Server (NestJS)
- Admin dashboard (front-end for content managers)
Theoretically, the startup can leverage existing APIs (e.g., via plugins) to seamlessly integrate with popular shipping carriers, payment gateways, and inventory management systems. This integration saves the startup’s development team time and resources while providing a seamless shopping experience for their customers. The thing is, not many plugins are available at the time of writing.
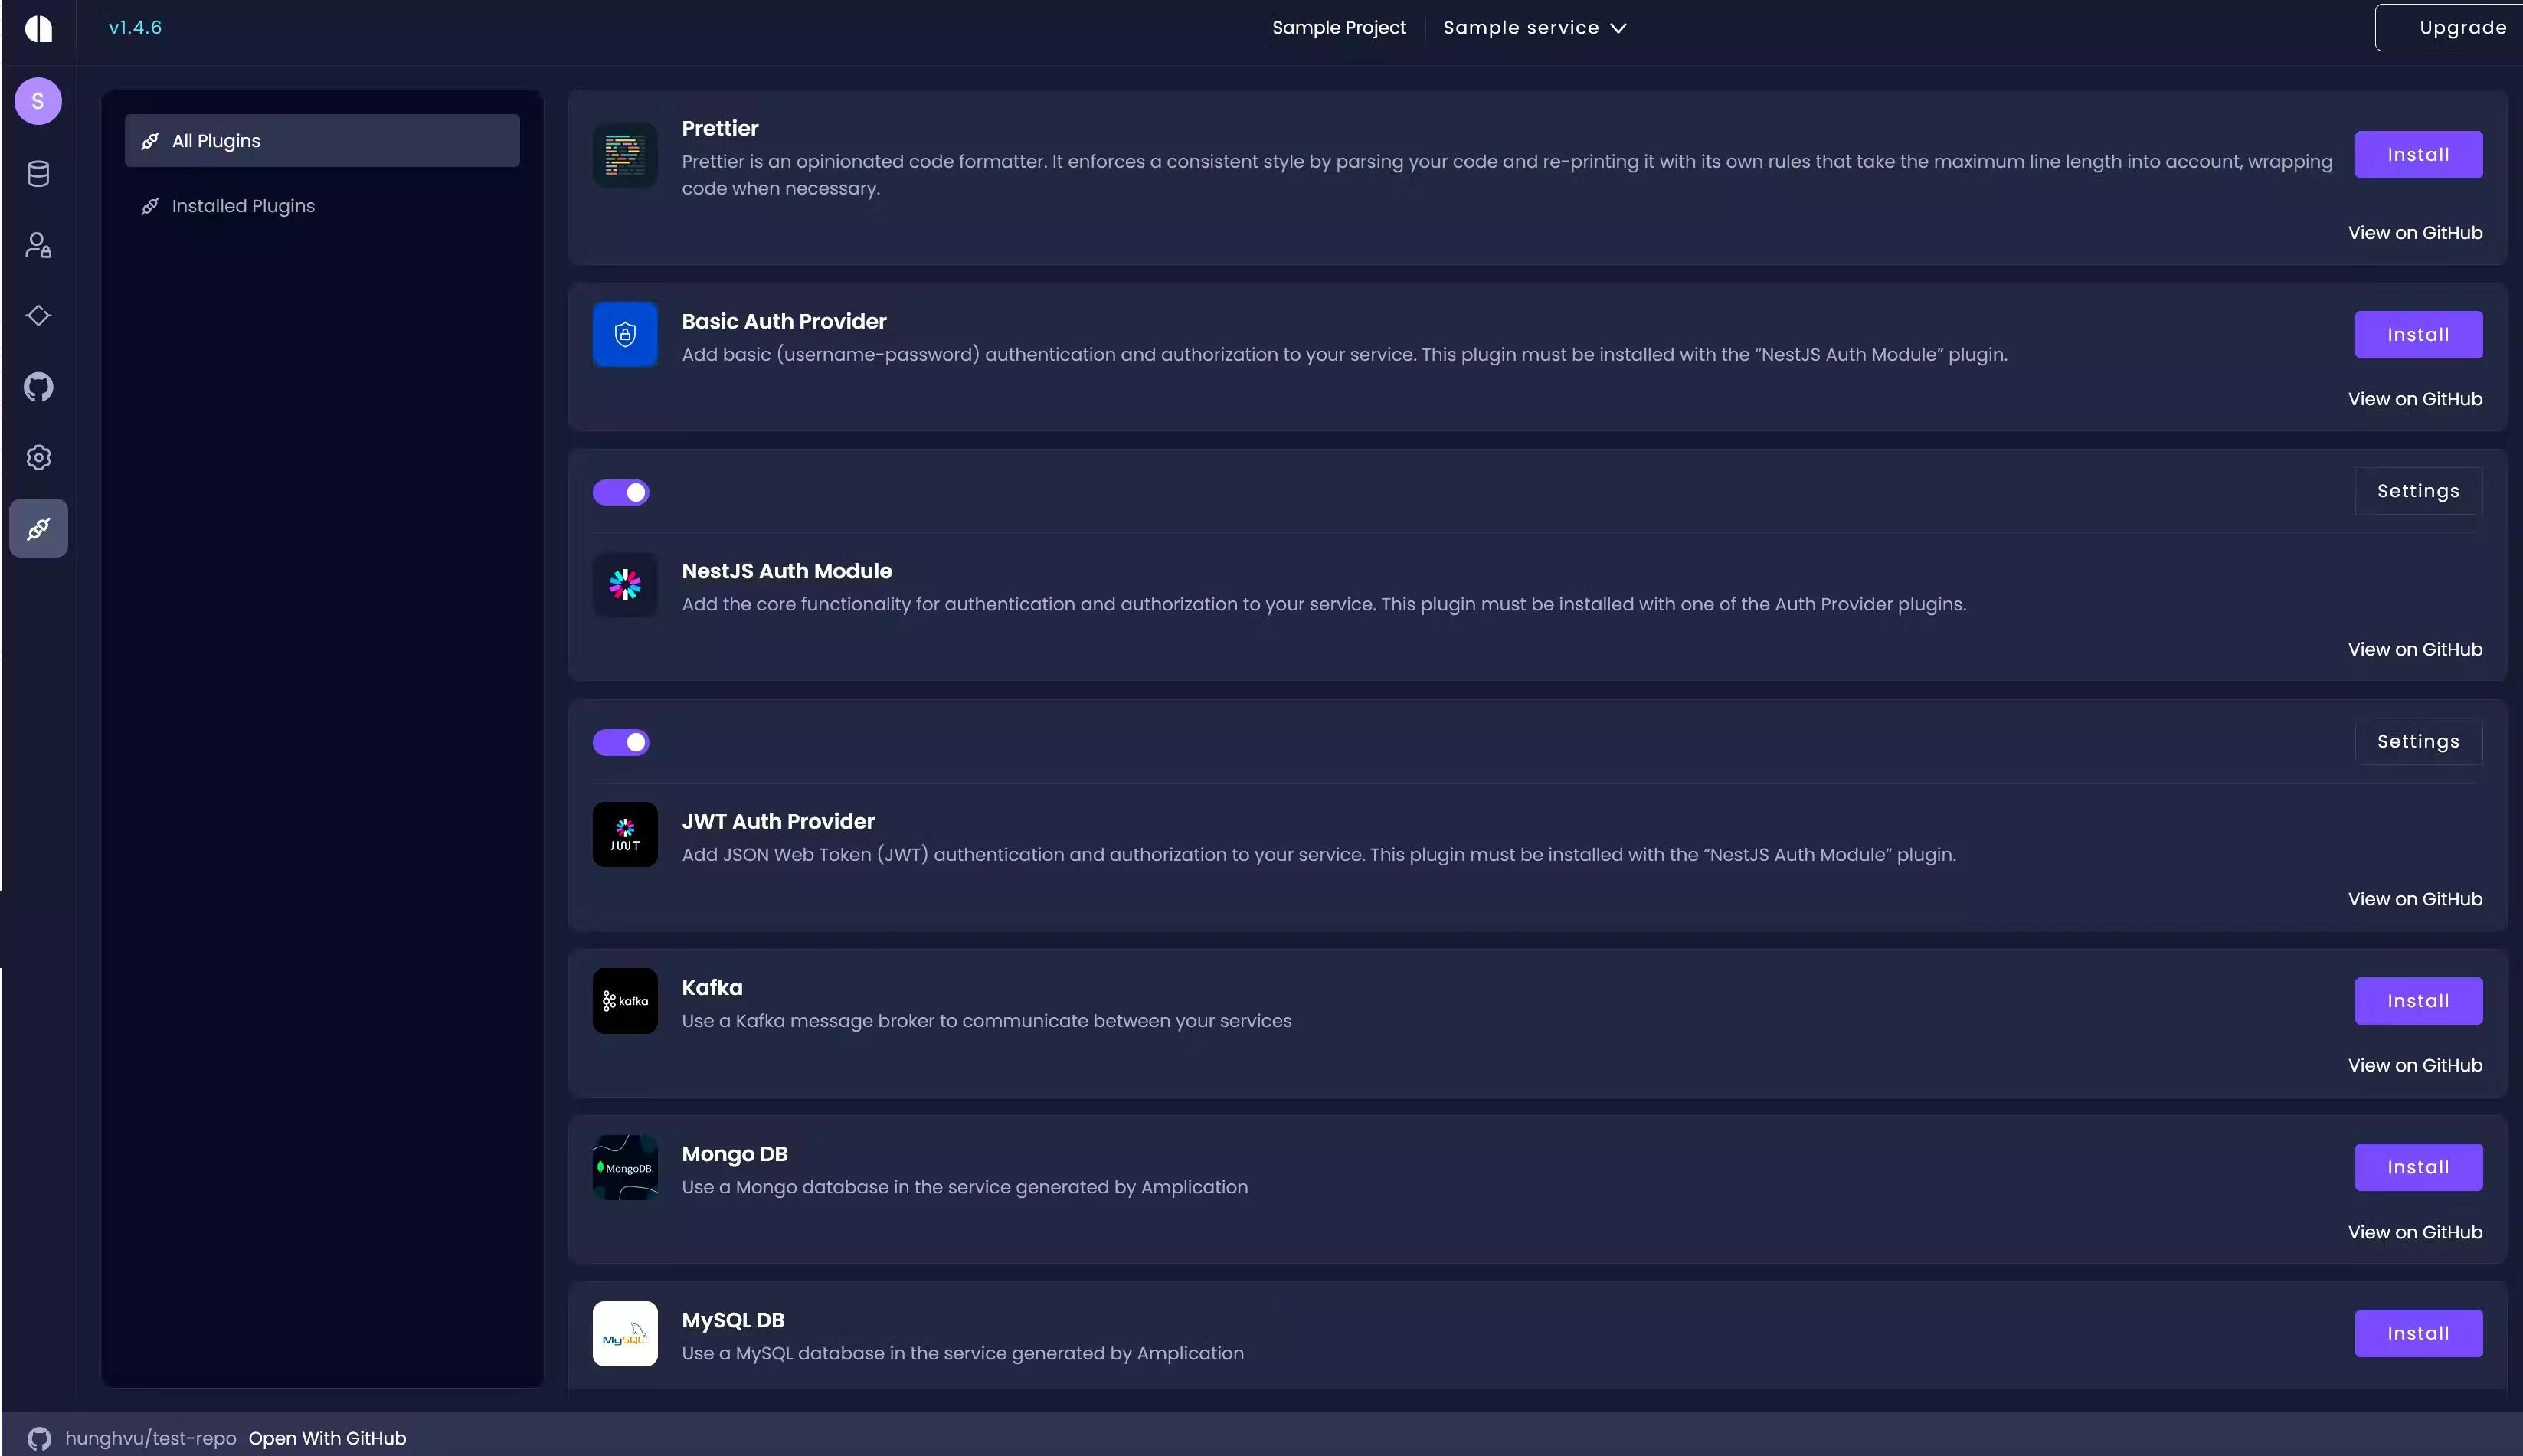
Considering the open-source nature of Amplication, more community plugins along with first-party solutions will become available over time. The startup needs a notification feature to let their customers know when new items arrive, but there is no notification plugin at the moment. Does it mean the startup has to wait for that specific plugin to come out? Not at all, for now, the startup can take advantage of the generated codebase and build a custom business logic using Novu, an open-source notification infrastructure.
What is custom code (and business logic) in Amplication?
In Amplication, there are two main layers of abstraction to have a separation of concerns.
- One layer is dedicated to code generated by Amplication.
- Another layer is dedicated to custom code so developers can customize apps and minimize merge conflicts. Technically said, the conflicts should not happen in the first place as two layers are isolated. However, as Amplication gets updated and breaking changes arrive, merging the code generated from different Amplication versions may require manual intervention.
When your application is generated, the folder structure looks like the below:
// Root
(config files)
prisma
scripts
src
- (NestJS project files/folders)
- (Entity folders)
  - base
  - <entity-name>.controller.ts
  - <entity-name>.module.ts
  - <entity-name>.resolver.ts
  - <entity-name>.service.ts
One layer of abstraction is in the base folder, and this is for files that are generated by Amplication. These files are not for customized code and will be overwritten by subsequent commits from Amplication. Meanwhile, the other layer of abstraction consists of files on the same level as the base folder. This means controller, module, resolver, and service are customizable and you can add more files or folders to the same directory as needed.
Being customizable, many categories of code can be implemented, such as:
- An action when a request hits an API.
- A query in a GraphQL resolver.
- Business logic in service and responses.
Business logic in this context is an operation performed when a database query is invoked (e.g., send a notification when a new item is added to the database). The following is a generic sample of implementing custom business logic in Amplication, but in the next section, you will dive into the practical usage of this feature.
// Author: Hung Vu
// <entity-name>.service.ts
// Example of adding business logic to a service
import { Injectable } from "@nestjs/common";
import { PrismaService } from "../prisma/prisma.service";
import { SneakerServiceBase } from "./base/sneaker.service.base";
@Injectable()
export class SneakerService extends SneakerServiceBase {
constructor(protected readonly prisma: PrismaService) {
super(prisma);
}
async create(data: any) {
// Add your custom business logic here
notifyCustomersOnNewArrivals();
return this.prisma.myModel.create({
data,
});
}
}
// <entity-name>.controller.ts
// Example of adding business logic to a REST API response
import * as common from "@nestjs/common";
import * as swagger from "@nestjs/swagger";
import * as nestAccessControl from "nest-access-control";
import { ProductService } from "./product.service";
import { ProductControllerBase } from "./base/product.controller.base";
@swagger.ApiTags("products")
@common.Controller("products")
export class ProductController extends ProductControllerBase {
constructor(
protected readonly service: ProductService,
@nestAccessControl.InjectRolesBuilder()
protected readonly rolesBuilder: nestAccessControl.RolesBuilder,
) {
super(service, rolesBuilder);
}
@Post()
@HttpCode(200)
async yourResponse() {
// Add your custom business logic here
}
}Example: How to implement a Discord notification in Amplication using Novu?
In this section, you will explore the integration between Amplication and Novu via Discord webhooks. This tutorial is not intended to cover the entire process from start to finish, and it assumes a certain knowledge of the initial steps like installation and user interface navigation. Considering the introductory nature of the tutorial, you do not need to be an expert in Amplication, Novu, and Discord. If you have not tried them out, go ahead and spend like 30 minutes reading over the documentation. That should be more than sufficient before getting to this tutorial.
Define user story, a hypothetical scenario
Coming back to the mentioned example, let’s say you are a fashion store owner. Your store has grown at a very decent rate in the past few years and now, you have a dedicated community on Discord. To increase customer experience, you want to have multi-channel notification features so customers know when new products arrive. Your website is powered by Amplication, and you have just learned about the unified API capabilities of Novu, an open-source notification infrastructure. This seems to be a good combination and with that in mind, your Discord community channel is the first group of customers to receive this update.
Create a Discord channel webhook
There are two main ways to integrate service with Discord: Webhooks and Discord Bots. At the time of writing, Novu only supports a webhook approach. To create a webhook:
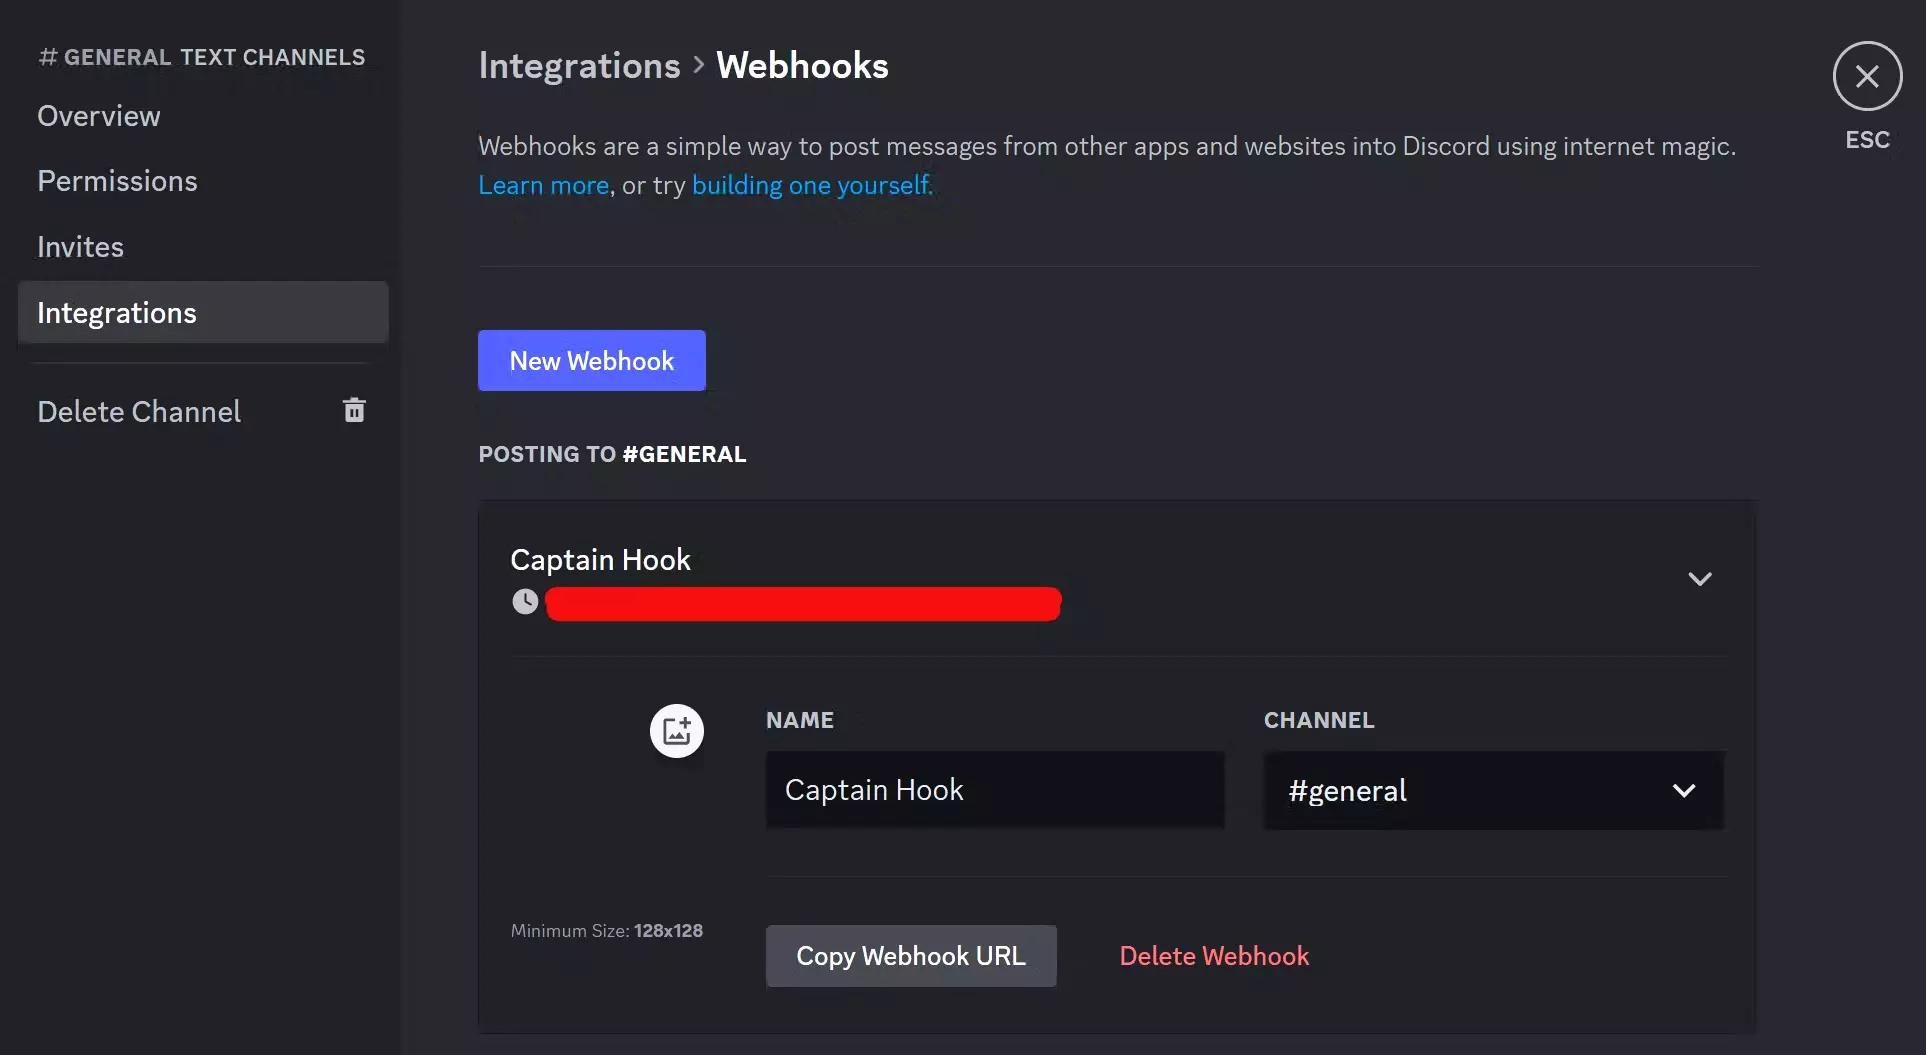
- Go to your Discord server and choose your targeted announcement channel.
- Hover your mouse over that channel, then go to the Edit channel dashboard.

- Navigate to Integrations, then choose Create Webhooks.
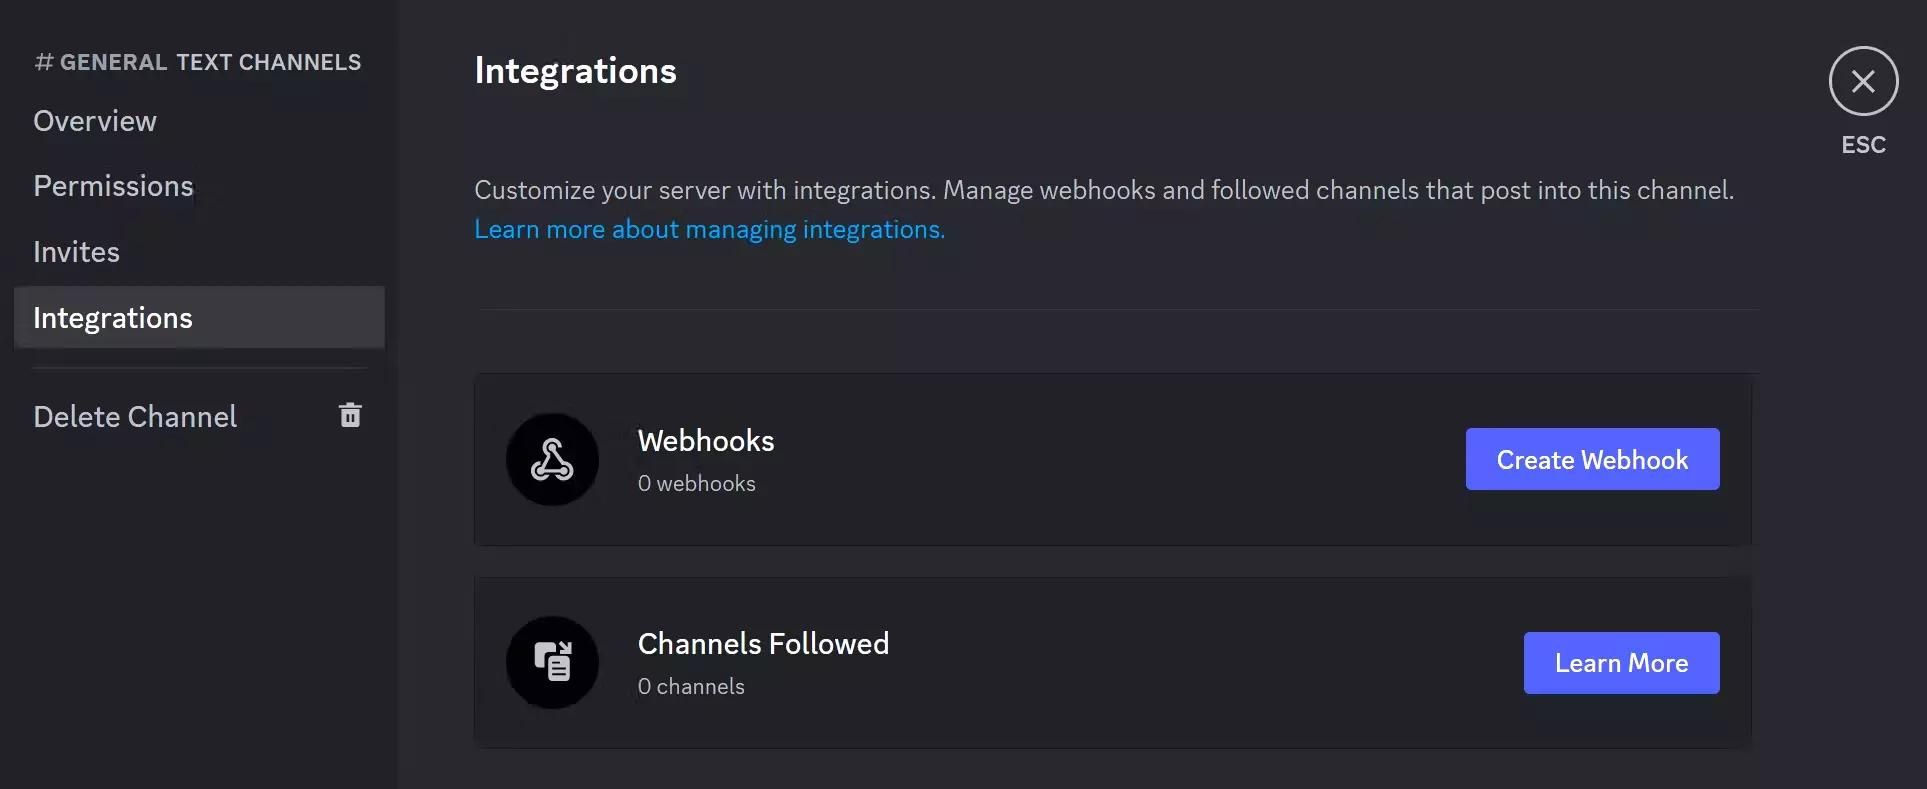
- Your first webhook is automatically created, click on that webhook and Copy Webhook URL. Remember, Discord webhooks do not require authentication, so it is sensitive. Do not share the URL publicly.
Configure Discord message channel in Novu
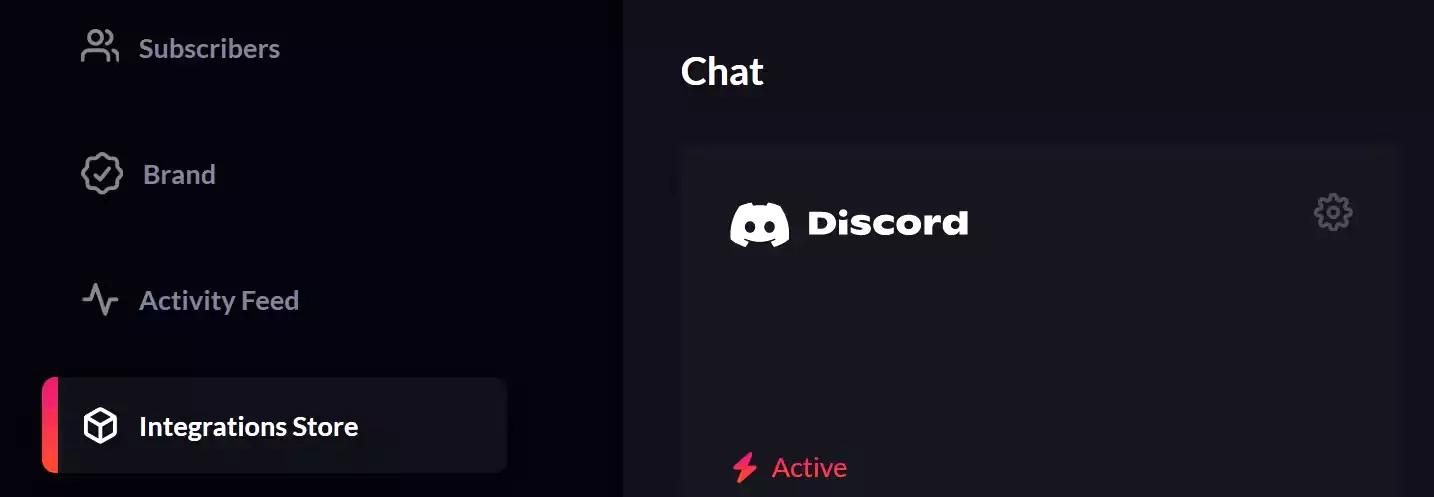
Novu offers a variety of integrations in their store, and Discord is one of them.
- Navigate to the Integration Store and activate Discord in the Chat section.
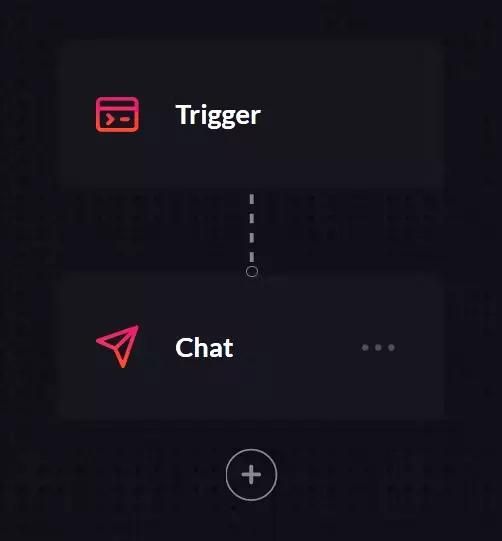
- Navigate to the Notifications tab, and create a new template.
- In the Edit Template dashboard, go to the Workflow editor.
- After Trigger, add the Chat step. In the Edit Chat Template, add the following:
A new product has just arrived, check it out atstore.example.com!
Register a service user with Novu
Normally, Novu is integrated using the flow below.
- Create a user in your user database (e.g., Amplication database).
- Upon user creation, create a Novu subscriber using your user id and contact information. This subscriber acts as a service user for the Discord notification functionality.
- Upon receiving a specific event on your backend, retrieve your targeted user(s) from the database.
- Using the user id, trigger notification templates via Novu unified API. This whole step can be inside a loop.
- Upon receiving a Trigger, Novu will use the provided user information, go over each workflow then send out a message dedicated to that user across different channels.
Although Discord is more of a group, non-personalized channel, there still needs an associated user in each trigger request. This user does not need to be in your store user database, it can be a pre-configured service user that you create in Novu at the beginning. To do so, fire up a temporary Node.js application and call Novu API.
// Author: Hung Vu
import { Novu } from "@novu/node";
const novu = new Novu(process.env.NOVU_API_KEY);
// The second parameter can be ignored as this
// service user is only there to trigger Discord notification.
await novu.subscribers.identify("discord");Implement a notification business logic in Amplication backend
For demonstration purposes, Amplication provides a sample service for the e-commerce backend and it will be used in the tutorial. To start, navigate to the server folder and install Novu’s SDK using:
npm install @novu/node
Then, navigate to src, create a global folder and put the following two files in there: notification.service.ts and notification.module.ts. In Nest.js, that is a way to define reusable modules which can then be imported across different services. In this case, we want to define a notification feature once and reuse it in different business logic.
/**
* notification.service.ts
*
* Author: Hung Vu
*
* Discord notification service powered by Novu.
*/
import { Injectable } from "@nestjs/common";
import { ChatProviderIdEnum, Novu } from "@novu/node";
@Injectable()
export class NotificationService {
novu = new Novu(process.env.NOVU_API_KEY!);
notifyDiscordCommunity = async () => {
try {
// You may notice there is no credential configuration for Discord webhook in Novu dashboard, so this step is to assign a URL to your service user.
await this.novu.subscribers.setCredentials(
process.env.NOVU_SERVICE_USER_ID!,
ChatProviderIdEnum.Discord,
{
// This is a Discord webhook URL retrieved in a very first step.
webhookUrl: process.env.DISCORD_WEBHOOK!,
},
);
// Send Discord notification via a service user.
await this.novu.trigger("discord", {
to: {
// This is a user ID created in a previous step.
subscriberId: process.env.NOVU_SERVICE_USER_ID!,
},
payload: {},
});
} catch (err) {
console.error(err);
}
};
}
/**
* notification.module.ts
*
* Author: Hung Vu
*
* Export the service to use in other modules.
*/
import { Module } from "@nestjs/common";
import { NotificationService } from "./notification.service";
@Module({
providers: [NotificationService],
exports: [NotificationService],
})
export class NotificationModule {}Now, let’s revisit the project requirement one more time: You want to have multi-channel notification features so customers know when new products arrive.
There are two parts to this statement:
- Multi-channel notification: This is out of the scope of our tutorial, but with the unified API of Novu, you can continue to scale horizontally with the provided introductory codebase.
- Let customers know when new products arrive: This means whenever you add a new
productto the database, Novu is triggered and sends out a Discord notification. To implement this, you need to modifyproduct.module.tsandproduct.controller.ts. The controller is only responsible for REST API requests. GraphQL-wise,product.resolver.tsneeds to be modified, but the general concept is the same.
/**
* product.module.ts
*
* Author: Hung Vu
*
* A central location to configure modules to be used in product endpoint.
*/
import { Module } from "@nestjs/common";
import { ProductModuleBase } from "./base/product.module.base";
import { ProductService } from "./product.service";
import { ProductController } from "./product.controller";
import { ProductResolver } from "./product.resolver";
import { NotificationModule } from "../global/notification.module";
@Module({
// Import the Notification module, so it can be used
// in the controller.
imports: [ProductModuleBase, NotificationModule],
controllers: [ProductController],
providers: [ProductService, ProductResolver],
exports: [ProductService],
})
export class ProductModule {}
/**
* product.controller.ts
*
* Author: Hung Vu
*
* Controller for product endpoint, that invoke Novu notification workflow
* when a new product is successfully added to the database.
*/
import * as common from "@nestjs/common";
import * as swagger from "@nestjs/swagger";
import * as nestAccessControl from "nest-access-control";
import { ProductService } from "./product.service";
import { ProductControllerBase } from "./base/product.controller.base";
import { NotificationService } from "../global/notification.service";
import { HttpCode, Post } from "@nestjs/common";
@swagger.ApiTags("products")
@common.Controller("products")
export class ProductController extends ProductControllerBase {
constructor(
protected readonly service: ProductService,
@nestAccessControl.InjectRolesBuilder()
protected readonly rolesBuilder: nestAccessControl.RolesBuilder,
// Gain access to NotificationService
protected notificationService: NotificationService,
) {
super(service, rolesBuilder);
}
// When a new product is successfully added to the database
// via REST API POST request, HTTP status code 200 is returned
// and fire a Discord notification workflow in Novu.
@Post()
@HttpCode(200)
async notifyDiscordCommunity() {
this.notificationService.notifyDiscordCommunity();
}
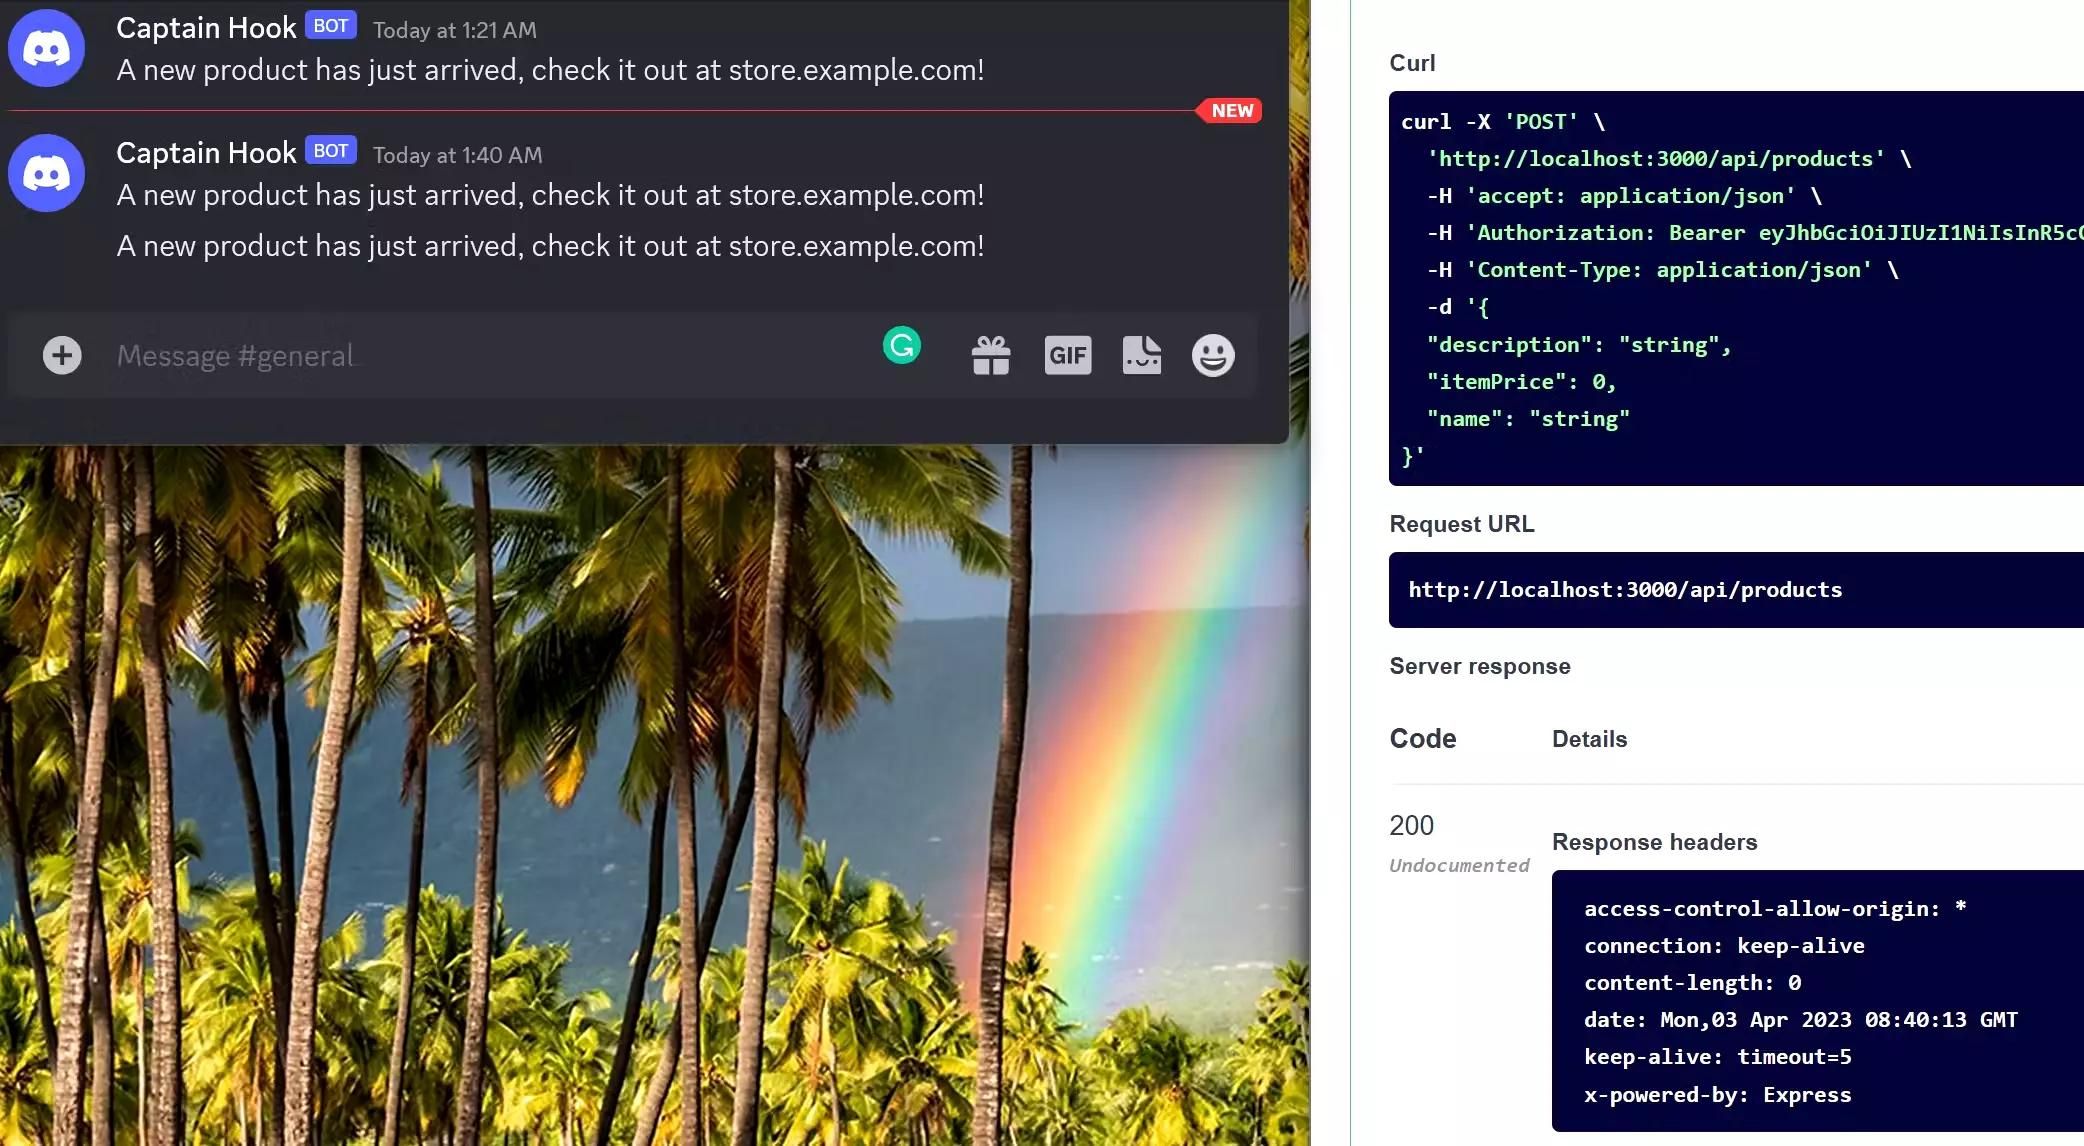
}And that is it, you have successfully integrated Amplication with Novu. With this, whenever a new item arrives, your beloved Discord community will be the first one to learn about it.
Wrap up
Depending on the scope of what you are trying to achieve, developing a production-ready application is not always a straight line to think of. That said, with the introduction of Amplication and Novu, both platforms excel in their own job and provide great solutions to speed up your development process while still maintaining a high-quality and human-readable codebase. All comes at no cost if self-hosted is your choice, but if you prefer delegating the hassle of managing bare metal infrastructure, both Amplication and Novu also provide cloud-based options.
This article is just the tip of the iceberg, it is highly recommended to take a look at the product documentation and see what they can do in the real world.
The repository for the codebase of this tutorial is available on GitHub.
If you find this article to be helpful, I have some more for you!
- Is Harvester a good hypervisor for a beginner? My hands-on experience
- Amplication vs Supabase vs Appwrite, for an effortless back end
- Advanced GitHub Actions - Conditional Workflow ❓
And, let’s connect!